

U.S. National Archives and Records Administration (NARA) Technical Guidelines for Digitizing Archival Materials for Electronic Access: Creation of Production Master Files -- Raster Images For the Following Record Types -- Textual, Graphic Illustrations/Artwork/Originals, Maps, Plans, Oversized, Photographs, Aerial Photographs, and Objects/Artifacts June 2004Written by Steven Puglia, Jeffrey Reed, and Erin RhodesDigital Imaging Lab, Special Media Preservation Laboratory, Preservation Programs Acknowledgements: Thank you to Dr. Don Williams for target analyses, technical guidance based on his extensive experience, and assistance on the assessment of digital capture devices. Thank you to the following for reading drafts of these guidelines and providing comments: Stephen Chapman, Bill Comstock, Maggie Hale, and David Remington of Harvard University; Phil Michel and Kit Peterson of the Library of Congress; and Doris Hamburg, Kitty Nicholson, and Mary Lynn Ritzenthaler of the U.S. National Archives and Records Administration. The NARA Technical Guidelines for Digitizing Archival Materials for Electronic Access define approaches for creating digital surrogates for facilitating access and reproduction; they are not considered appropriate for preservation reformatting to create surrogates that will replace original records. The Technical Guidelines presented here are based on the procedures used by the Digital Imaging Lab of NARA's Special Media Preservation Laboratory for digitizing archival records and the creation of production master image files, and are a revision of the 1998 "NARA Guidelines for Digitizing Archival Materials for Electronic Access", which describes the imaging approach used for NARA's pilot Electronic Access Project. The Technical Guidelines are intended to be informative, and not intended to be prescriptive. We hope to provide a technical foundation for digitization activities, but further research will be necessary to make informed decisions regarding all aspects of digitizing projects. These guidelines provide a range of options for various technical aspects of digitization, primarily relating to image capture, but do not recommend a single approach. The intended audience for these guidelines includes those who will be planning, managing, and approving digitization projects, such as archivists, librarians, curators, managers, and others. Another primary audience includes those actually doing scanning and digital capture, such as technicians and photographers.
-2-
-3-
-5- I. INTRODUCTIONThese Guidelines define approaches for creating digital surrogates for facilitating access and reproduction. They are not considered appropriate for preservation reformatting to create surrogates that will replace original records. For further discussion of the differences between these two approaches, see Appendix A, Digitization for Preservation vs. Production Masters. These guidelines provide technical benchmarks for the creation of "production master" raster image (pixel-based) files. Production masters are files used for the creation of additional derivative files for distribution and/or display via a monitor and for reproduction purposes via hardcopy output at a range of sizes using a variety of printing devices (see Appendix B, Derivative Files, for more information). Our aim is to use the production master files in an automated fashion to facilitate affordable reprocessing. Many of the technical approaches discussed in these guidelines are intended for this purpose. Production master image files have the following attributes --
If your intended usage for production master image files is different and you do not need all the potential capabilities of images produced to meet the recommended image parameters, then you should select appropriate image parameters for your project. In other words, your approach to digitization may differ and should be tailored to the specific requirements of the project. Generally, given the high costs and effort for digitization projects, we do not recommend digitizing to anything less than our alternative minimum image parameters. This assumes availability of suitable high-quality digitization equipment that meets the assessment criteria described below (see Quantifying Scanner/Digital Camera Performance) and produces image files that meet the minimum quality described in the Technical Guidelines. If digitization equipment fails any of the assessment criteria or is unable to produce image files of minimum quality, then it may be desirable to invest in better equipment or to contract with a vendor for digitization services. II. METADATANOTE: All digitization projects undertaken at NARA and covered by NARA 816 Digitizing Activities for Enhanced Access, including those involving partnerships with outside organizations, must ensure that descriptive information is prepared in accordance with NARA 1301 Life Cycle Data Standards and Lifecycle Authority Control, at http://www.nara-at-work.gov/nara_policies_and_guidance/directives/1300_series/nara1301.html (NARA internal link only), and its associated Lifecycle Data Requirements Guide, and added to NARA's Archival Research Catalog (ARC) at a time mutually agreed-upon with NARA. -6- Although there are many technical parameters discussed in these Guidelines that define a high-quality production master image file, we do not consider an image to be of high quality unless metadata is associated with the file. Metadata makes possible several key functions -- the identification, management, access, use, and preservation of a digital resource -- and is therefore directly associated with most of the steps in a digital imaging project workflow: file naming, capture, processing, quality control, production tracking, search and retrieval design, storage, and long-term management. Although it can be costly and time-consuming to produce, metadata adds value to production master image files: images without sufficient metadata are at greater risk of being lost. No single metadata element set or standard will be suitable for all projects or all collections. Likewise, different original source formats (text, image, audio, video, etc.) and different digital file formats may require varying metadata sets and depths of description. Element sets should be adapted to fit requirements for particular materials, business processes and system capabilities. Because no single element set will be optimal for all projects, implementations of metadata in digital projects are beginning to reflect the use of "application profiles," defined as metadata sets that consist of data elements drawn from different metadata schemes, which are combined, customized and optimized for a particular local application or project. This "mixing and matching" of elements from different schemas allows for more useful metadata to be implemented at the local level while adherence to standard data values and structures is still maintained. Locally-created elements may be added as extensions to the profile, data elements from existing schemas might be modified for specific interpretations or purposes, or existing elements may be mapped to terminology used locally. Because of the likelihood that heterogeneous metadata element sets, data values, encoding schemes, and content information (different source and file formats) will need to be managed within a digital project, it is good practice to put all of these pieces into a broader context at the outset of any project in the form of a data or information model. A model can help to define the types of objects involved and how and at what level they will be described (i.e., are descriptions hierarchical in nature, will digital objects be described at the file or item level as well as at a higher aggregate level, how are objects and files related, what kinds of metadata will be needed for the system, for retrieval and use, for management, etc.), as well as document the rationale behind the different types of metadata sets and encodings used. A data model informs the choice of metadata element sets, which determine the content values, which are then encoded in a specific way (in relational database tables or an XML document, for example). Although there is benefit to recording metadata on the item level to facilitate more precise retrieval of images within and across collections, we realize that this level of description is not always practical. Different projects and collections may warrant more in-depth metadata capture than others; a deep level of description at the item level, however, is not usually accommodated by traditional archival descriptive practices. The functional purpose of metadata often determines the amount of metadata that is needed. Identification and retrieval of digital images may be accomplished on a very small amount of metadata; however, management of and preservation services performed on digital images will require more finely detailed metadata -- particularly at the technical level, in order to render the file, and at the structural level, in order to describe the relationships among different files and versions of files. Metadata creation requires careful analysis of the resource at hand. Although there are current initiatives aimed at automatically capturing a given set of values, we believe that metadata input is still largely a manual process and will require human intervention at many points in the object's lifecycle to assess the quality and relevance of metadata associated with it. This section of the Guidelines serves as a general discussion of metadata rather than a recommendation of specific metadata element sets; although several elements for production master image files are suggested as minimum-level information useful for basic file management. We are currently investigating how we will implement and formalize technical and structural metadata schemes into our workflow and anticipate that this section will be updated on a regular basis. Common Metadata Types:Several categories of metadata are associated with the creation and management of production master image files. The following metadata types are the ones most commonly implemented in imaging projects. Although these categories are defined separately below, there is not always an obvious distinction between them, since each type contains elements that are both descriptive and administrative in nature. These types are commonly broken down by what functions the metadata supports. In general, the types of metadata listed below, except for descriptive, are usually found "behind the scenes" in databases rather than in public access systems. As a result, these types of metadata tend to be less standardized and more aligned with local requirements. -7- Descriptive --Descriptive metadata refers to information that supports discovery and identification of a resource (the who, what, when and where of a resource). It describes the content of the resource, associates various access points, and describes how the resource is related to other resources intellectually or within a hierarchy. In addition to bibliographic information, it may also describe physical attributes of the resource such as media type, dimension, and condition. Descriptive metadata is usually highly structured and often conforms to one or more standardized, published schemes, such as Dublin Core or MARC. Controlled vocabularies, thesauri, or authority files are commonly used to maintain consistency across the assignment of access points. Descriptive information is usually stored outside of the image file, often in separate catalogs or databases from technical information about the image file. Although descriptive metadata may be stored elsewhere, it is recommended that some basic descriptive metadata (such as a caption or title) accompany the structural and technical metadata captured during production. The inclusion of this metadata can be useful for identification of files or groups of related files during quality review and other parts of the workflow, or for tracing the image back to the original. Descriptive metadata is not specified in detail in this document; however, we recommend the use of the Dublin Core Metadata
Element [1] set to capture minimal descriptive metadata information where metadata in another formal data standard does not exist. Metadata
should be collected directly in Dublin Core; if it is not used for direct data collection, a mapping to Dublin Core elements
is recommended. A mapping to Dublin Core from a richer, local metadata scheme already in use may also prove helpful for data
exchange across other projects utilizing Dublin Core. Not all Dublin Core elements are required in order to create a valid
Dublin Core record. However, we suggest that production master images be accompanied by the following elements at the very
minimum:
These selected elements serve the purpose of basic identification of a file. Additionally, the Dublin Core elements "Format" (describes data types) and "Type" (describes limited record types) may be useful in certain database applications where sorting or filtering search results across many record genres or data types may be desirable. Any local fields that are important within the context of a particular project should also be captured to supplement Dublin Core fields so that valuable information is not lost. We anticipate that selection of metadata elements will come from more than one preexisting element set -- elements can always be tailored to specific formats or local needs. Projects should support a modular approach to designing metadata to fit the specific requirements of the project. Standardizing on Dublin Core supplies baseline metadata that provides access to files, but this should not exclude richer metadata that extends beyond the Dublin Core set, if available. For large-scale digitization projects, only minimal metadata may be affordable to record during capture, and is likely to consist of linking image identifiers to page numbers and indicating major structural divisions or anomalies of the resource (if applicable) for text documents. For photographs, capturing caption information (and Still Photo identifier) is ideal. For other non-textual materials, such as posters and maps, descriptive information taken directly from the item being scanned as well as a local identifier should be captured. If keying of captions into a database is prohibitive, if possible scan captions as part of the image itself. Although this information will not be searchable, it will serve to provide some basis of identification for the subject matter of the photograph. Recording of identifiers is important for uniquely identifying resources and is necessary for locating and managing them. It is likely that digital images will be associated with more than one identifier -- for the image itself, for metadata or database records that describe the image, and for reference back to the original. Dublin Core Metadata Initiative, (http://dublincore.org/usage/terms/dc/current-elements/). The Dublin Core element set is
characterized by simplicity in creation of records, flexibility, and extensibility. It facilitates description of all types
of resources and is intended to be used in conjunction with other standards that may offer fuller descriptions in their respective
domains. For images to be entered into NARA's Archival Research Catalog (ARC), a more detailed complement of metadata is required. For a more detailed discussion of descriptive metadata requirements for digitization projects at NARA, -8- we refer readers to NARA's Lifecycle Data Requirements Guide (LCDRG), at: http://www.archives.gov/research_room/arc/arc_info/lifecycle_data_requirements.doc (June 2004), and NARA internal link -- http://www.nara-at-work.gov/archives_and_records_mgmt/archives_and_activities/accessioning_processing_description/lifecycle/index.html (January 2002), which contains data elements developed for the archival description portion of the records lifecycle, and associates these elements with many different hierarchical levels of archival materials from record groups to items. The LCDRG also specifies rules for data entry. The LCDRG also requires a minimum set of other metadata to be recorded for raster image files at the file level, including technical metadata that enables images to display properly in the ARC interface.Additionally, enough compatibility exists between Dublin Core and the data requirements that NARA has developed for archival description to provide a useful mapping between data elements, if a digital project requires that metadata also be managed locally (outside of ARC), perhaps in a local database or digital asset management system that supports data in Dublin Core. Please see Appendix C for a listing of mandatory elements identified in the Lifecycle Data Requirements Guide at the record group, series, file unit and item level, with Dublin Core equivalents. Because ARC will be used as the primary source for descriptive information about the holdings of permanent records at NARA, we refer readers to the LCDRG framework rather than discuss Encoded Archival Description (EAD) of finding aids. NARA has developed its own hierarchical descriptive structure that relates to Federal records in particular, and therefore has not implemented EAD locally. However, because of the prevalence of the use of EAD in the wider archival and digitization communities, we have included a reference here. For more information on EAD, see the official EAD site at the Library of Congress at http://lcweb.loc.gov/ead/; as well as the Research Library Group's Best Practices Guidelines for EAD at http://www.rlg.org/rlgead/eadguides.html. Administrative --The Dublin Core set does not provide for administrative, technical, or highly structured metadata about different document types. Administrative metadata comprises both technical and preservation metadata, and is generally used for internal management of digital resources. Administrative metadata may include information about rights and reproduction or other access requirements, selection criteria or archiving policy for digital content, audit trails or logs created by a digital asset management system, persistent identifiers, methodology or documentation of the imaging process, or information about the source materials being scanned. In general, administrative metadata is informed by the local needs of the project or institution and is defined by project-specific workflows. Administrative metadata may also encompass repository-like information, such as billing information or contractual agreements for deposit of digitized resources into a repository. For additional information, see Harvard University Library's Digital Repository Services (DRS) User Manual for Data Loading, Version 2.04 at http://hul.harvard.edu/ois/systems/drs/drs_load_manual.pdf, particularly Section 5.0, "DTD Element Descriptions" for application of administrative metadata in a repository setting; Making of America 2 (MOA2) Digital Object Standard: Metadata, Content, and Encoding at http://www.cdlib.org/about/publications/CDLObjectStd-2001.pdf; the Dublin Core also has an initiative for administrative metadata at http://metadata.net/admin/draft-iannella-admin-01.txt in draft form as it relates to descriptive metadata. The Library of Congress has defined a data dictionary for various formats in the context of METS, Data Dictionary for Administrative Metadata for Audio, Image, Text, and Video Content to Support the Revision of Extension Schemas for METS, available at http://lcweb.loc.gov/rr/mopic/avprot/extension2.html. Rights --Although metadata regarding rights management information is briefly mentioned above, it encompasses an important piece of administrative metadata that deserves further discussion. Rights information plays a key role in the context of digital imaging projects and will become more and more prominent in the context of preservation repositories, as strategies to act upon digital resources in order to preserve them may involve changing their structure, format, and properties. Rights metadata will be used both by humans to identify rights holders and legal status of a resource, and also by systems that implement rights management functions in terms of access and usage restrictions. Because rights management and copyright are complex legal topics, the General Counsel's office (or a lawyer) should be consulted for specific guidance and assistance. The following discussion is provided for informational purposes only and should not be considered specific legal advice. Generally, records created by employees of the Federal government as part of their routine duties, works for hire created under contract to the Federal government, and publications produced by the Federal government are all in -9- the public domain. However, it is not enough to assume that if NARA has physical custody of a record that it also owns the intellectual property in that record. NARA also has custody of other records, where copyright may not be so straightforward -- such as personal letters written by private individuals, personal papers from private individuals, commercially published materials of all types, etc. -- which are subject to certain intellectual property and privacy rights and may require additional permissions from rights holders. After transfer or donation of records to NARA from other federal agencies or other entities, NARA may either: own both the physical record and the intellectual property in the record; own the physical record but not the intellectual property; or the record is in the public domain. It is important to establish who owns or controls both the physical record and the copyright at the beginning of an imaging project, as this affects reproduction, distribution, and access to digital images created from these records.Metadata element sets for intellectual property and rights information are still in development, but they will be much more detailed than statements that define reproduction and distribution policies. At a minimum, rights-related metadata should include: the legal status of the record; a statement on who owns the physical and intellectual aspects of the record; contact information for these rights holders; as well as any restrictions associated with the copying, use, and distribution of the record. To facilitate bringing digital copies into future repositories, it is desirable to collect appropriate rights management metadata at the time of creation of the digital copies. At the very least, digital versions should be identified with a designation of copyright status, such as: "public domain;" "copyrighted" (and whether clearance/permissions from rights holder has been secured); "unknown;" "donor agreement/contract;" etc. Preservation metadata dealing with rights management in the context of digital repositories will likely include detailed information on the types of actions that can be performed on data objects for preservation purposes and information on the agents or rights holders that authorize such actions or events. For an example of rights metadata in the context of libraries and archives, a rights extension schema has recently been added to the Metadata Encoding and Transmission Standard (METS), which documents metadata about the intellectual rights associated with a digital object. This extension schema contains three components: a rights declaration statement; detailed information about rights holders; and context information, which is defined as "who has what permissions and constraints within a specific set of circumstances." The schema is available at: http://www.loc.gov/standards/rights/METSRights.xsd. For additional information on rights management, see: Peter B. Hirtle, "Archives or Assets?" at http://techreports.library.cornell.edu:8081/Dienst/UI/1.0/Display/cul.lib/2003-2; June M. Besek, Copyright Issues Relevant to the Creation of a Digital Archive: A Preliminary Assessment, January 2003 at http://www.clir.org/pubs/reports/pub112/contents.html; Adrienne Muir, "Copyright and Licensing for Digital Preservation," at http://www.cilip.org.uk/update/issues/jun03/article2june.html; Karen Coyle, Rights Expression Languages, A Report to the Library of Congress, February 2004, available at http://www.loc.gov/standards/Coylereport_final1single.pdf; MPEG-21 Overview v.5 contains a discussion on intellectual property and rights at http://www.chiariglione.org/mpeg/standards/mpeg-21/mpeg-21.htm; for tables that reference when works pass into the public domain, see Peter Hirtle, "When Works Pass Into the Public Domain in the United States: Copyright Term for Archivists and Librarians," at http://www.copyright.cornell.edu/training/Hirtle_Public_Domain.htm and Mary Minow, "Library Digitization Projects: Copyrighted Works that have Expired into the Public Domain" at http://www.librarylaw.com/DigitizationTable.htm; and for a comprehensive discussion on libraries and copyright, see: Mary Minow, Library Digitization Projects and Copyright at http://www.llrx.com/features/digitization.htm. Technical --Technical metadata refers to information that describes attributes of the digital image (not the analog source of the image) and helps to ensure that images will be rendered accurately. It supports content preservation by providing information needed by applications to use the file and to successfully control the transformation or migration of images across or between file formats. Technical metadata also describes the image capture process and technical environment, such as hardware and software used to scan images, as well as file format-specific information, image quality, and information about the source object being scanned, which may influence scanning decisions. Technical metadata helps to ensure consistency across a large number of files by enforcing standards for their creation. At a minimum, technical metadata should capture the information necessary to render, display, and use the resource. Technical metadata is characterized by information that is both objective and subjective -- attributes of image quality that can be measured using objective tests as well as information that may be used in a subjective assessment of an image's value. Although tools for automatic creation and capture of many objective components -10- are badly needed, it is important to determine what metadata should be highly structured and useful to machines, as opposed to what metadata would be better served in an unstructured, free-text note format. The more subjective data is intended to assist researchers in the analysis of digital resource or imaging specialists and preservation administrators in determining long-term value of a resource.In addition to the digital image, technical metadata will also need to be supplied for the metadata record itself if the metadata is formatted as a text file or XML document or METS document, for example. In this sense, technical metadata is highly recursive, but necessary for keeping both images and metadata understandable over time. Requirements for technical metadata will differ for various media formats. For digital still images, we refer to the NISO Data Dictionary -- Technical Metadata for Digital Still Images at http://www.niso.org/standards/resources/Z39_87_trial_use.pdf. It is a comprehensive technical metadata set based on the Tagged Image File Format specification, and makes use of the data that is already captured in file headers. It also contains metadata elements important to the management of image files that are not present in header information, but that could potentially be automated from scanner/camera software applications. An XML schema for the NISO technical metadata has been developed at the Library of Congress called MIX (Metadata in XML), which is available at http://www.loc.gov/standards/mix/. See also the TIFF 6.0 Specification at http://partners.adobe.com/asn/developer/pdfs/tn/TIFF6.pdf as well as the Digital Imaging Group's DIG 35 metadata element set at http://www.i3a.org/i_dig35.html; and Harvard University Library's Administrative Metadata for Digital Still Images data dictionary at http://hul.harvard.edu/ldi/resources/ImageMetadata_v2.pdf. A new initiative led by the Research Libraries Group called "Automatic Exposure: Capturing Technical Metadata for Digital Still Images" is investigating ways to automate the capture of technical metadata specified in the NISO Z39.87 draft standard. The initiative seeks to build automated capture functionality into scanner and digital camera hardware and software in order to make this metadata readily available for transfer into repositories and digital asset management systems, as well as to make metadata capture more economically viable by reducing the amount of manual entry that is required. This implies a level of trust that the metadata that is automatically captured and internal to the file is inherently correct. See http://www.rlg.org/longterm/autotechmetadata.html for further discussion of this initiative, as well as the discussion on Image Quality Assessment, below. Initiatives such as the Global Digital Format Registry (http://hul.harvard.edu/gdfr/) could potentially help in reducing the number of metadata elements that need to be recorded about a file or group of files regarding file format information necessary for preservation functions. Information maintained in the Registry could be pointed to instead of recorded for each file or batch of files. Structural --Structural metadata describes the relationships between different components of a digital resource. It ties the various parts of a digital resource together in order to make a useable, understandable whole. One of the primary functions of structural metadata is to enable display and navigation, usually via a page-turning application, by indicating the sequence of page images or the presence of multiple views of a multi-part item. In this sense, structural metadata is closely related to the intended behaviors of an object. Structural metadata is very much informed by how the images will be delivered to the user as well as how they will be stored in a repository system in terms of how relationships among objects are expressed. Structural metadata often describes the significant intellectual divisions of an item (such as chapter, issue, illustration, etc.) and correlates these divisions to specific image files. These explicitly labeled access points help to represent the organization of the original object in digital form. This does not imply, however, that the digital must always imitate the organization of the original -- especially for non-linear items, such as folded pamphlets. Structural metadata also associates different representations of the same resource together, such as production master files with their derivatives, or different sizes, views, or formats of the resource. Example structural metadata might include whether the resource is simple or complex (multi-page, multi-volume, has discrete parts, contains multiple views); what the major intellectual divisions of a resource are (table of contents, chapter, musical movement); identification of different views (double-page spread, cover, detail); the extent (in files, pages, or views) of a resource and the proper sequence of files, pages and views; as well as different technical (file formats, size), visual (pre- or post-conservation treatment), intellectual (part of a larger collection or work), and use (all instances of a resource in different formats -- TIFF files for display, PDF files for printing, OCR file for full text searching) versions. -11- File names and organization of files in system directories comprise structural metadata in its barest form. Since meaningful structural metadata can be embedded in file and directory names, consideration of where and how structural metadata is recorded should be done up front. See Section V. Storage for further discussion on this topic. No widely adopted standards for structural metadata exist since most implementations of structural metadata are at the local level and are very dependent on the object being scanned and the desired functionality in using the object. Most structural metadata is implemented in file naming schemes and/or in databases that record the order and hierarchy of the parts of an object so that they can be identified and reassembled back into their original form. The Metadata Encoding and Transmission Standard (METS) is often discussed in the context of structural metadata, although it is inclusive of other types of metadata as well. METS provides a way to associate metadata with the digital files they describe and to encode the metadata and the files in a standardized manner, using XML. METS requires structural information about the location and organization of related digital files to be included in the METS document. Relationships between different representations of an object as well as relationships between different hierarchical parts of an object can be expressed. METS brings together a variety of metadata about an object all into one place by allowing the encoding of descriptive, administrative, and structural metadata. Metadata and content information can either be wrapped together within the METS document, or pointed to from the METS document if they exist in externally disparate systems. METS also supports extension schemas for descriptive and administrative metadata to accommodate a wide range of metadata implementations. Beyond associating metadata with digital files, METS can be used as a data transfer syntax so objects can easily be shared; as a Submission Information Package, an Archival Information Package, and a Dissemination Information Package in an OAIS-compliant repository (see below); and also as a driver for applications, such as a page turner, by associating certain behaviors with digital files so that they can be viewed, navigated, and used. Because METS is primarily concerned with structure, it works best with "library-like" objects in establishing relationships among multi-page or multi-part objects, but it does not apply as well to hierarchical relationships that exist in collections within an archival context. See http://www.loc.gov/standards/mets/ for more information on METS. Behavior --Behavior metadata is often referred to in the context of a METS object. It associates executable behaviors with content information that define how a resource should be utilized or presented. Specific behaviors might be associated with different genres of materials (books, photographs, Powerpoint presentations) as well as with different file formats. Behavior metadata contains a component that abstractly defines a set of behaviors associated with a resource as well as a "mechanism" component that points to executable code (software applications) that then performs a service according to the defined behavior. The ability to associate behaviors or services with digital resources is one of the attributes of a METS object and is also part of the "digital object architecture" of the Fedora digital repository system. See http://www.fedora.info/documents/master-spec-12.20.02.pdf for a discussion of Fedora and digital object behaviors. Preservation --Preservation metadata encompasses all information necessary to manage and preserve digital assets over time. Preservation metadata is usually defined in the context of the OAIS reference model (Open Archival Information System, http://ssdoo.gsfc.nasa.gov/nost/isoas/overview.html), and is often linked to the functions and activities of a repository. It differs from technical metadata in that it documents processes performed over time (events or actions taken to preserve data and the outcomes of these events) as opposed to explicitly describing provenance (how a digital resource was created) or file format characteristics, but it does encompass all types of the metadata mentioned above, including rights information. Although preservation metadata draws on information recorded earlier (technical and structural metadata would be necessary to render and reassemble the resource into an understandable whole), it is most often associated with analysis of and actions performed on a resource after submission to a repository. Preservation metadata might include a record of changes to the resource, such as transformations or conversions from format to format, or indicate the nature of relationships among different resources. Preservation metadata is information that will assist in preservation decision-making regarding the long-term value of a digital resource and the cost of maintaining access to it, and will help to both facilitate archiving strategies for digital images as well as support and document these strategies over time. Preservation metadata is commonly linked with digital preservation strategies such as migration and emulation, as well as more "routine" system-level actions such as copying, backup, or other automated processes carried out on large numbers of objects. These strategies will rely on all types of pre-existing metadata and will also generate and record new -12- metadata about the object. It is likely that this metadata will be both machine-processable and "human-readable" at different levels to support repository functions as well as preservation policy decisions related to these objects.In its close link to repository functionality, preservation metadata may reflect or even embody the policy decisions of a repository; but these are not necessarily the same policies that apply to preservation and reformatting in a traditional context. The extent of metadata recorded about a resource will likely have an impact on future preservation options to maintain it. Current implementations of preservation metadata are repository- or institution-specific. We anticipate that a digital asset management system may provide some basic starter functionality for low-level preservation metadata implementation, but not to the level of a repository modeled on the OAIS. See also A Metadata Framework to Support the Preservation of Digital Objects at http://www.oclc.org/research/projects/pmwg/pm_framework.pdf and Preservation Metadata for Digital Objects: A Review of the State of the Art at http://www.oclc.org/research/projects/pmwg/presmeta_wp.pdf, both by the OCLC/RLG Working Group on Preservation Metadata, for excellent discussions of preservation metadata in the context of the OAIS model. A new working group, "Preservation Metadata: Implementation Strategies," is working on developing best practices for implementing preservation metadata and on the development of a recommended core set of preservation metadata. Their work can be followed at http://www.oclc.org/research/projects/pmwg/. For some examples of implementations of preservation metadata element sets at specific institutions, see: OCLC Digital Archive Metadata, at http://www.oclc.org/support/documentation/pdf/da_metadata_elements.pdf; Florida Center for Library Automation Preservation Metadata, at http://www.fcla.edu/digitalArchive/pdfs/Archive_data_dictionary20030703.pdf; Technical Metadata for the Long-Term Management of Digital Materials, at http://dvl.dtic.mil/metadata_guidelines/TechMetadata_26Mar02_1400.pdf; and The National Library of New Zealand, Metadata Standard Framework, Preservation Metadata, at http://www.natlib.govt.nz/files/4initiatives_metaschema_revised.pdf. Image quality assessment (NARA-NWTS Digital Imaging Lab proposed metadata requirement)-The technical metadata specified in the NISO Data Dictionary -- Technical Metadata for Digital Still Images contains many metadata fields necessary for the long-term viability of the image file. However, we are not convinced that it goes far enough in providing information necessary to make informed preservation decisions regarding the value and quality of a digital still raster image. Judgments about the quality of an image require a visual inspection of the image, a process that cannot be automated. Quality is influenced by many factors -- such as the source material from which the image was scanned, the devices used to create the image, any subsequent processing done to the image, compression, and the overall intended use of the image. Although the data dictionary includes information regarding the analog source material and the scanning environment in which the image was created, we are uncertain whether this information is detailed enough to be of use to administrators, curators, and others who will need to make decisions regarding the value and potential use of digital still images. The value of metadata correlates directly with the future use of the metadata. It seems that most technical metadata specified in the NISO data dictionary is meant to be automatically captured from imaging devices and software and intended to be used by systems to render and process the file, not necessarily used by humans to make decisions regarding the value of the file. The metadata can make no guarantee about the quality of the data. Even if files appear to have a full complement of metadata and meet the recommended technical specifications as outlined in these Technical Guidelines, there may still be problems with the image file that cannot be assessed without some kind of visual inspection. The notion of an image quality assessment was partly inspired by the National Library of Medicine Permanence Ratings (see http://www.nlm.nih.gov/pubs/reports/permanence.pdf and http://www.rlg.org/events/pres-2000/byrnes.html), a rating for resource permanence or whether the content of a resource is anticipated to change over time. However, we focused instead on evaluating image quality and this led to the development of a simplified rating system that would: indicate a quality level for the suitability of the image as a production master file (its suitability for multiple uses or outputs), and serve as a potential metric that could be used in making preservation decisions about whether an image is worth maintaining over time. If multiple digital versions of a single record exist, then the image quality assessment rating may be helpful for deciding which version(s) to keep. The rating is linked to image defects introduced in the creation of intermediates and/or introduced during digitization and image processing, and to the nature and severity of the defects based on evaluating the digital -13- images on-screen at different magnifications. In essence, a "good" rating for image files implies an appropriate level of image quality that warrants the effort to maintain them over time.The image quality assessment takes into account the attributes that influence specifications for scanning a production master image file: format, size, intended use, significant characteristics of the original that should be maintained in the scan, and the quality and characteristics of the source material being scanned. This rating system could later be expanded to take into account other qualities such as object completeness (are all pages or only parts of the resource scanned?); the source of the scan (created in-house or externally provided?); temporal inconsistencies (scanned at different times, scanned on different scanners, scan of object is pre- or post-conservation treatment?), and enhancements applied to the image for specific purposes (for exhibits, cosmetic changes among others). This rating is not meant to be a full technical assessment of the image, but rather an easy way to provide information that supplements existing metadata about the format, intent, and use of the image, all of which could help determine preservation services that could be guaranteed and associated risks based on the properties of the image. We anticipate a preservation assessment will to be carried out later in the object's lifecycle based on many factors, including the image quality assessment. Image quality rating metadata is meant to be captured at the time of scanning, during processing, and even at the time of ingest into a repository. When bringing batches or groups of multiple image files into a repository that do not have individual image quality assessment ratings, we recommend visually evaluating a random sample of images and applying the corresponding rating to all files in appropriate groups of files (such as all images produced on the same model scanner or all images for a specific project). Record whether the image quality assessment rating was applied as an individual rating or as a batch rating. If a batch rating, then record how the files were grouped. -14-
As stated earlier, image quality assessment rating is applied to the digital image but is also linked to information regarding the source material from which it was scanned. Metadata about the image files includes a placeholder for information regarding source material, which includes a description of whether the analog source is the original or an intermediate, and if so, what kind of intermediate (copy, dupe, microfilm, photocopy, etc.) as well as the source format. Knowledge of deficiencies in the source material (beyond identifying the record type and format) helps to inform image quality assessment as well. The practicality of implementing this kind of assessment has not yet been tested, especially since it necessitates a review of images at the file level. Until this conceptual approach gains broader acceptance and consistent implementation within the community, quality assessment metadata may only be useful for local preservation decisions. As the assessment is inherently technical in nature, a basic foundation in photography and imaging is -15- helpful in order to accurately evaluate technical aspects of the file, as well as to provide a degree of trustworthiness in the reviewer and in the rating that is applied.Records management/recordkeeping --Another type of metadata, relevant to the digitization of federal records in particular, is records management metadata. Records management metadata is aligned with administrative-type metadata in that its function is to assist in the management of records over time; this information typically includes descriptive (and, more recently, preservation) metadata as a subset of the information necessary to both find and manage records. Records management metadata is usually discussed in the context of the systems or domains in which it is created and maintained, such as Records Management Application (RMA) systems. This includes metadata about the records as well as the organizations, activities, and systems that create them. The most influential standard in the United States on records management metadata is the Department of Defense's Design Criteria Standard for Electronic Records Management Software Applications (DOD 5015.2) at http://www.dtic.mil/whs/directives/corres/html/50152std.htm. This standard focuses on minimum metadata elements a RMA should capture and maintain, defines a set of metadata elements at the file plan, folder, and record levels, and generally discusses the functionality that an RMA should have as well as the management, tracking, and integration of metadata that is held in RMAs. Records Management metadata should document whether digital images are designated as permanent records, new records, temporary records, reference copies, or are accorded a status such as "indefinite retention." A determination of the status of digital images in a records management context should be made front at the point of creation of the image, as this may have an effect on the level and detail of metadata that will be gathered for a digital object to maintain its significant properties and functionality over the long term. Official designation of the status of the digital images will be an important piece of metadata to have as digital assets are brought into a managed system, such as NARA's Electronic Records Archive (ERA), which will have extensive records management capabilities. In addition to a permanent or temporary designation, records management metadata should also include documentation on any access and/or usage restrictions for the image files. Metadata documenting restrictions that apply to the images could become essential if both unrestricted and restricted materials and their metadata are stored and managed together in the same system, as these files will possess different maintenance, use and access requirements. Even if restricted files are stored on a physically separate system for security purposes, metadata about these files may not be segregated and should therefore include information on restrictions. For digitization projects done under NARA 816 guidance, we assume classified, privacy restricted, and any records with other restrictions will not be selected for digitization. However, records management metadata should still include documentation on access and usage restrictions -- even unrestricted records should be identified as "unrestricted." This may be important metadata to express at the system level as well, as controls over access to and use of digital resources might be built directly into a delivery or access system. In the future, documentation on access and use restrictions relevant to NARA holdings might include information such as: "classified" (which should be qualified by level of classification); "unclassified" or "unrestricted;" "declassified;" and "restricted," (which should be qualified by a description of the restrictions, i.e., specific donor-imposed restrictions), for example. Classification designation will have an impact on factors such as physical storage (files may be physically or virtually stored separately), who has access to these resources, and different maintenance strategies. Basic records management metadata about the image files will facilitate bringing them into a formal system and will inform functions such as scheduling retention timeframes, how the files are managed within a system, what types or levels of preservation services can be performed, or how they are distributed and used by researchers, for example. Tracking --Tracking metadata is used to control or facilitate the particular workflow of an imaging project during different stages of production. Elements might reflect the status of digital images as they go through different stages of the workflow (batch information and automation processes, capture, processing parameters, quality control, archiving, identification of where/media on which files are stored); this is primarily internally-defined metadata that serves as documentation of the project and may also serve also serve as a statistical source of information to track and report on progress of image files. Tracking metadata may exist in a database or via a directory/folder system. -16- Meta-metadata --Although this information is difficult to codify, it usually refers to metadata that describes the metadata record itself, rather than the object it is describing, or to high-level information about metadata "policy" and procedures, most often on the project level. Meta-metadata documents information such as who records the metadata, when and how it gets recorded, where it is located, what standards are followed, and who is responsible for modification of metadata and under what circumstances. It is important to note that metadata files yield "master" records as well. These non-image assets are subject to the same rigor of quality control and storage as master image files. Provisions should be made for the appropriate storage and management of the metadata files over the long term. Assessment of Metadata Needs for Imaging Projects:Before beginning any scanning, it is important to conduct an assessment both of existing metadata and metadata that will be needed in order to develop data sets that fit the needs of the project. The following questions frame some of the issues to consider:
-17- Local Implementation:Because most of what we scan comes to the Imaging Lab on an item-by-item basis, we are capturing minimal descriptive and technical metadata at the item level only during the image capture and processing stage. Until a structure into which we can record hierarchical information both about the objects being scanned and their higher-level collection information is in place, we are entering basic metadata in files using Adobe Photoshop. Information about the file is added to the IPTC (International Press Telecommunications Council) fields in Photoshop in anticipation of mapping these values to an external database. The IPTC fields are used as placeholder fields only. This information is embedded in the file using Adobe XMP (Extensible Metadata Platform: http://www.adobe.com/products/xmp/main.html). Primary identifier is automatically imported into the "File -19- Info" function in Photoshop from our scanning software. We anticipate implementing the Custom Panel Description File Format feature available in XMP to define our own metadata set and then exporting this data into an asset management system, since the data will be stored in easily migratable XML packets.The following tables outline minimal descriptive, technical, and structural metadata that we are currently capturing at the
file level (table indicates the elements that logically apply at the object level):
* Describes physical attributes of the source material that may assist in interpretation of image quality; describes capture and processing decisions; or indicates known problems with the original media that may affect the quality of the scan. A controlled vocabulary is used for these fields. We feel that it is important to record source object information in technical metadata. Knowledge of the source material will inform image quality assessment and future preservation decisions. For images derived from another digital image, source information will be described in a relationship field, most likely from a set of typed relationships (e.g., "derived from"). -20- Technical metadata is currently entered into an external project database to describe specific derivative files. We anticipate that this information will map up to attributes of the production master files. The following table describes suggested minimum technical metadata fields for production masters.
* See "Image Quality Assessment" discussion above. Structural metadata is currently embedded into the file name in a sequential numbering scheme for multi-part items and is reflected in working file directory structures. We anticipate that the file name, which follows the scheme: unique ID_scan year_component part_image role.format extension, can be parsed so that component parts of a digital resource can be logically related together. We also record minimal structural metadata in the header information, such as "front" and "back" for double-sided items or "cover," "page 1," "page 2," "double-page spread" etc. for multi-page items or multi-views. "Component part" is strictly a file sequence number and does not reflect actual page numbers. This metadata is currently recorded as text since the data is not intended to feed into any kind of display or navigation application at the moment. Relationships --Currently there is no utility to record basic relationships among multi-page or multi-part image files beyond documenting relationships in file names. Until a digital asset management system is in place, our practice is to capture as much metadata as possible in the surrounding file structure (names, directories, headers). However, we consider that simple labels or names for file identifiers coupled with more sophisticated metadata describing relationships across files are the preferred way forward to link files together. This metadata would include file identifiers and metadata record identifiers and a codified or typed set of relationships that would help define the associations between image files and between different representations of the same resource. (Relationships between the digital object and the analog source object or the place of the digital object in a larger collection hierarchy would be documented elsewhere in descriptive metadata). Possible relationship types include identification of principal or authoritative version (for production master file); derivation relationships indicating what files come from what files; whether the images were created in the lab or come from another source; structural relationships (for multi-page or -part objects); sibling relationships (images of the same intellectual resource, but perhaps scanned from different source formats). We intend to further refine our work on relationships in the coming months, and start to define metadata that is specific to aggregations of files. Batch level metadata --Currently, data common to all files produced in the Imaging Lab (such as byte order, file format, etc.) is not recorded at the logical level at this time, but we anticipate integrating this kind of information into the construction of a digital asset management system. We are continuing discussions on how to formalize "Lab common -21- knowledge," such as details about the hardware and software configurations used to scan and process digital images, target information, and capture and image processing methodologies into our technical metadata specifications.Permanent and temporary metadata --When planning for a digital imaging project, it may not be necessary to save all metadata created and used during the digitization phase of the project. For example, some tracking data may not be needed once all quality control and redo work has been completed. It may not be desirable, or necessary, to bring all metadata into a digital repository. For NARA's pilot Electronic Access Project, metadata fields that were calculated from other fields, such as square area of a document (used during the pre-scan planning phase to determine scanning resolution and size of access file derivatives), were not saved in the final database since they could be recalculated in the future. Also, it may not be desirable or necessary to provide access to all metadata that is maintained within a system to all users. Most administrative and technical metadata will need to be accessible to administrative users to facilitate managing the digital assets, but does not need to be made available to general users searching the digital collections. III. TECHNICAL OVERVIEWRaster Image Characteristics:Spatial Resolution --Spatial resolution determines the amount of information in a raster image file in terms of the number of picture elements or pixels per unit measurement, but it does not define or guarantee the quality of the information. Spatial resolution defines how finely or widely spaced the individual pixels are from each other. The higher the spatial resolution the more finely spaced and the larger number of pixels overall. The lower the spatial resolution the more widely spaced the pixels and the fewer number of pixels overall. Spatial resolution is measured as pixels per inch or PPI, also pixels per millimeter or pixels per centimeter are used. Resolution is often referred to as dots per inch or DPI, in common usage the terms PPI and DPI are used interchangeably. Since raster image files are composed of pixels, technically PPI is a more accurate term and is used in this document (one example in support of using the PPI term is that Adobe Photoshop software uses the pixels per inch terminology). DPI is the appropriate term for describing printer resolution (actual dots vs. pixels); however, DPI is used often in scanning and image processing software to refer to spatial resolution and this usage is an understandable convention. The spatial resolution and the image dimensions determine the total number of pixels in the image; an 8"x10" photograph scanned at 100 ppi produces an image that has 800 pixels by 1000 pixels or a total of 800,000 pixels. The numbers of rows and columns of pixels, or the height and width of the image in pixels as described in the previous sentence, is known as the pixel array. When specifying a desired file size, it is always necessary to provide both the resolution and the image dimensions; ex. 300 ppi at 8"x10" or even 300 ppi at original size. The image file size, in terms of data storage, is proportional to the spatial resolution (the higher the resolution, the larger the file size for a set document size) and to the size of the document being scanned (the larger the document, the larger the file size for a set spatial resolution). Increasing resolution increases the total number of pixels resulting in a larger image file. Scanning larger documents produces more pixels resulting in larger image files. Higher spatial resolution provides more pixels, and generally will render more fine detail of the original in the digital image, but not always. The actual rendition of fine detail is more dependent on the spatial frequency response of the scanner or digital camera (see Quantifying Scanner/Digital Camera Performance below), the image processing applied, and the characteristics of the item being scanned. Also, depending on the intended usage of the production master files, there may be a practical limit to how much fine detail is actually needed. Signal Resolution --Bit-depth or signal resolution, sometimes called tonal resolution, defines the maximum number of shades and/or colors in a digital image file, but does not define or guarantee the quality of the information. In a 1-bit file each pixel is represented by a single binary digit (either a 0 or 1), so the pixel can be either black or white. There are only two possible combinations or 21 = 2. -22- The common standard for grayscale and color images is to use 8-bits (eight binary digits representing each pixel) of data per channel and this provides a maximum of 256 shades per channel ranging from black to white; 28 = 256 possible combinations of zeroes and ones. High-bit or 16-bits (16 binary digits representing each pixel) per channel images can have a greater number of shades compared to 8-bit per channel images, a maximum of over 65,000 shades vs. 256 shades; 216 -- 65,536 possible combinations of zeroes and ones. Well done 8-bits per channel imaging will meet most needs; with a limited ability for major corrections, transformations, and re-purposing because gross corrections of 8-bit per channel images may cause shades to drop out of the image, creating a posterization effect, due to the limited number of shades. High-bit images can match the effective shading and density range of photographic originals (assuming the scanner is actually able to capture the information), and, due to the greater shading (compared to 8-bits per channel), may be beneficial when re-purposing images and when working with images that need major or excessive adjustments to the tone distribution and/or color balance. However, at this time, monitors for viewing images and output devices for printing images all render high-bit images at 8-bits per pixel, so there is limited practical benefit to saving high-bit images and no way to verify the accuracy and quality of high-bit images. Also, it is best to do a good job during digitization to ensure accurate tone and color reproduction, rather than relying on post-scan correction of high-bit images. Poorly done high-bit imaging has no benefit. Color Mode --Grayscale image files consist of a single channel, commonly either 8-bits (256 levels) or 16-bits (65,536 levels) per pixel with the tonal values ranging from black to white. Color images consist of three or more grayscale channels that represent color and brightness information, common color modes include RGB (red, green, blue), CMYK (cyan, magenta, yellow, black), and LAB (lightness, red-green, blue-yellow). The channels in color files may be either 8 bits (256 levels) or 16-bits (65,536 levels). Display and output devices mathematically combine the numeric values from the multiple channels to form full color pixels, ranging from black to white and to full colors. RGB represents an additive color process -- red, green and blue light are combined to form white light. This is the approach commonly used by computer monitors and televisions, film recorders that image onto photographic film, and digital printers/enlargers that print to photographic paper. RGB files have three color channels: 3 channels x 8 bits = 24-bit color file or 3 channels x 16-bits = 48-bit color. All scanners and digital cameras create RGB files, by sampling for each pixel the amount of light passing through red, green and blue filters that is reflected or transmitted by the item or scene being digitized. Black is represented by combined RGB levels of 0-0-0, and white is represented by combined RGB levels of 255-255-255. This is based on 8-bit imaging and 256 levels from 0 to 255; this convention is used for 16-bit imaging as well, despite the greater number of shades. All neutral colors have equal levels in all three color channels. A pure red color is represented by levels of 255-0-0, pure green by 0-255-0, and pure blue by 0-0-255. CMYK files are an electronic representation of a subtractive process -- cyan (C), magenta (M) and yellow (Y) are combined to form black. CMYK mode files are used for prepress work and include a fourth channel representing black ink (K). The subtractive color approach is used in printing presses (four color printing), color inkjet and laser printers (four color inks, many photo inkjet printers now have more colors), and almost all traditional color photographic processes (red, green and blue sensitive layers that form cyan, magenta and yellow dyes). LAB color mode is a device independent color space that is matched to human perception -- three channels representing lightness (L, equivalent to a grayscale version of the image), red and green information (A), and blue and yellow information (B). LAB mode benefits would include the matching to human perception and they do not require color profiles (see section on color management), disadvantages include the potential loss of information in the conversion from the RGB mode files from scanners and digital cameras, need to have high-bit data, and few applications and file formats support the mode. Avoid saving files in CMYK mode, CMYK files have a significantly reduced color gamut (see section on color management) and are not suitable for production master image files for digital imaging projects involving holdings/collections in cultural institutions. While theoretically LAB may have benefits, at this time we feel that RGB files produced to the color and tone reproduction described in these guidelines and saved with an Adobe RGB 1998 color profile are the most practical option for production master files and are relatively device independent. We acknowledge our workflow to produce RGB production master files may incur some level of loss of data, however we believe the benefits of using RGB files brought to a common rendering outweigh the minor loss. -23- Digitization Environment:Our recommendations and the ISO standards referred to below are based on using CRT monitors. Most LCD monitors we have tested do not compare in quality to the better CRTs in rendering fine detail and smooth gradients. Also, LCD monitors may have artifacts that make it difficult to distinguish image quality problems in the image files, and the appearance of colors and monitor brightness shift with the viewing angle of the LCD panel. This is changing rapidly and the image quality of current high-end LCD monitors is very close to the quality of better CRT monitors. If used, LCD monitors should meet the criteria specified below. Viewing conditions --A variety of factors will affect the appearance of images, whether displayed or printed on reflective, transmissive or emissive devices or media. Those factors that can be quantified must be controlled to assure proper representation of an image. We recommend following the guidance in the following standards --
NOTE -- The following are common parameters controlled by users, however refer to the standards for complete requirements and test methods. In particular, ISO 12646 specifies additional hardware requirements for monitors to ensure a reasonable quality level necessary for comparison to hardcopy. Monitor settings, light boxes, and viewing booths --We assume the assessment of many digital images will be made in comparison to the originals that have been digitized, therefore ISO 12646 should be followed where it supplements or differs from ISO 3664. We recommend digital images be viewed on a computer monitor set to 24 bits (millions of colors) or greater, and calibrated to a gamma of 2.2. ISO 12646 recommends the color temperature of the monitor also be set to 5000K (D50 illuminant) to match the white point of the illumination used for viewing the originals. Monitor luminance level must be at least 85 cd/m2, and should be 120 cd/m2 or higher. The computer/monitor desktop should be set to a neutral gray background (avoid images, patterns, and/or strong colors), preferably no more than 10% of the maximum luminance of the screen. For viewing originals, we recommend using color correct light boxes or viewing booths that have a color temperature of 5000K (D50 illuminant), as specified in ISO 3664. ISO 3664 provides two luminance levels for viewing originals, ISO 12646 recommends using the lower levels (P2 and T2) when comparing to the image on screen. The actual illumination level on originals should be adjusted so the perceived brightness of white in the originals matches the brightness of white on the monitor. The room --The viewing environment should be painted/decorated a neutral, matte gray with a 60% reflectance or less to minimize flare and perceptual biases. Monitors should be positioned to avoid reflections and direct illumination on the screen. -24- ISO 12646 requires the room illumination be less than 32 lux when measured anywhere between the monitor and the observer, and the light a color temperature of approximately 5000K. Practical experience --In practice, we have found a tolerable range of deviation from the measurements required in the ISO standards. When the ambient room lighting is kept below the limit set in ISO 12646, its color temperature can be lower than 5000K, as long as it is less than the monitor color temperature. To compensate for environments that may not meet the ISO standards, as well as difficulties comparing analog originals to images on a monitor, the color temperature may need to be set higher than 5000K so that the range of grays from white to black appears neutral when viewed in the actual working environment. The higher color temperature may also be necessary for older monitors to reach an appropriate brightness, as long as neutrals don't appear too blue when compared to neutral hardcopy under the specified illumination. Monitor calibration --In order to meet and maintain the monitor settings summarized above, we recommend using CRT monitors designed for the graphic arts, photography, or multimedia markets. A photosensor-based color calibrator and appropriate software (either bundled with the monitor or a third party application) should be used to calibrate the monitor to the aims discussed above. This is to ensure desired color temperature, luminance level, neutral color balance, and linearity of the red, green, and blue representation on the monitor are achieved. If using an ICC color managed workflow (see section on color management), an ICC profile should be created after monitor calibration for correct rendering of images. The monitor should be checked regularly and recalibrated when necessary. Using a photo sensor-based monitor calibrator, however, does not always ensure monitors are calibrated well. Ten years of practical experience has shown calibrators and calibration software may not work accurately or consistently. After calibration, it is important to assess the monitor visually, to make sure the monitor is adjusted appropriately. Assess overall contrast, brightness, and color neutrality of the gray desktop. Also, evaluate both color neutrality and detail rendering in white and black areas. This can be done using an image target of neutral patches ranging from black to white and saved in LAB color mode (since LAB does not require an ICC profile and can be viewed independently of the color managed process). In addition, it may be helpful to evaluate sample images or scans of targets -- such as the NARA Monitor Adjustment Target (shown below) and/or a known image such as a scan of a Kodak grayscale adjusted to the aimpoints (8-8-8/105-105-105/247-247-247) described below.
Quantifying Scanner/Digital Camera Performance:Much effort has gone into quantifying the performance of scanners and digital cameras in an objective manner. The following tests are used to check the capabilities of digitization equipment, and provide information on how to best use the equipment. -25- Even when digitization equipment is assessed as described below, it is still necessary to have knowledgeable and experienced staff to evaluate images visually. At this time, it is not possible to rely entirely on the objective test measurements to ensure optimum image quality. It is still necessary to have staff with the visual literacy and technical expertise to do a good job with digitization and to perform quality control for digital images. This is true for the digitization of all types of archival records, but very critical for the digitization of photographic images. Also, these tests are useful when evaluating and comparing scanners and digital cameras prior to purchase. Ask manufacturers and vendors for actual test results, rather than relying on the specifications provided in product literature, some performance claims in product literature are often overstated. If test results are not available, then try to scan test targets during a demonstration and consider having the analyses performed by a contract service. During digitization projects, tests should be performed on a routine basis to ensure scanners and digital cameras/copy systems are performing optimally. Again, if it is not possible to analyze the tests in-house, then consider having a service perform the analyses on the resulting image files. The following standards either are available or are in development, these test methods can be used for objective assessment of scanner or digital camera/copy system performance --
These standards can be purchased from ISO at http://www.iso.ch or from IHS Global at http://global.ihs.com. At this time, test methods and standards do not exist for all testing and device combinations. However, many tests are applicable across the range of capture device types and are cited in the existing standards as normative references. Other test methods may be used to quantify scanner/digital camera performance. We anticipate there will be additional standards and improved test methods developed by the group working on the above standards. Unfortunately, at this time image analysis software is expensive and complex making it difficult to perform all the tests needed to properly quantify scanner/digital camera performance. Also, there is a range of test targets needed for these tests and they can be expensive to purchase. The following requirements for performance criteria are based on measurements of the variety of actual scanners and digital cameras used in the NWTS Digital Imaging Lab. Where limits are specified, the limits are based on the performance of equipment we consider subjectively acceptable. This subjective acceptability is based on many years combined staff experience in the fields of photography, of photographic reformatting and duplication of a variety of archival records, and of digital imaging and digitization of a variety of archival records. No digitization equipment or system is perfect, they all have trade-offs in regards to image quality, speed, and cost. The engineering of scanners and digital cameras represents a compromise, and for many markets image quality is sacrificed for higher speed and lower cost of equipment. Many document and book scanners, office scanners (particularly inexpensive ones), and high-speed scanners (all types) may not meet the limits specified, particularly for properties like image noise. Also, many office and document scanners are set at the default to force the paper of the original document to pure white in the image, clipping all the texture and detail in the paper (not desirable for most originals in collections of cultural institutions). These scanners will not be able to meet the desired tone reproduction without recalibration (which may not be possible), without changing the scanner settings (which may not overcome the problem), or without modification of the scanner and/or software (not easily done). Test Frequency and Equipment Variability:After equipment installation and familiarization with the hardware and software, an initial performance capability evaluation should be conducted to establish a baseline for each specific digitization device. At a minimum, this benchmark assessment would include for example --
-26- Many scanners can be used both with the software/device drivers provided by the manufacturer and with third-party software/device drivers, characterize the device using the specific software/device drivers to be used for production digitization. Also, performance can change dramatically (and not always for the better) when software/device drivers are updated, characterize the device after every update. A full suite of tests should be conducted to quantify the performance of digitization systems. Some tests probably only need to be redone on an infrequent basis, while others will need to be done on a routine basis. Depending on the performance consistency of equipment, consider performing tests using production settings on a weekly basis or for each batch of originals, whichever comes first. You may want to perform appropriate tests at the beginning of each batch and at the end of each batch to confirm digitization was consistent for the entire batch. Scanner/digital camera performance will vary based on actual operational settings. Tests can be used to optimize scanner/camera settings. The performance of individual scanners and digital cameras will vary over time (see test frequency above). Also, the performance of different units of the same model scanner/camera will vary. Test every individual scanner/camera with the specific software/device driver combination(s) used for production. Perform appropriate test(s) any time there is an indication of a problem. Compare these results to past performance through a cumulative database. If large variability is noted from one session to the next for given scanner/camera settings, attempt to rule out operator error first. Tests:Opto-electronic conversion function (OECF) -- for grayscale and color imaging --
Dynamic range -- for grayscale and color imaging --
Spatial frequency response (SFR) -- for grayscale and color imaging --
Noise -- for grayscale and color imaging --
Channel registration -- for color imaging --
Uniformity -- illumination, color, lens coverage, etc. -- for gray scale and color imaging --
Dimensional accuracy - for 1-bit, grayscale, and color imaging --
Other artifacts or imaging problems --
Reference Targets:We recommend including reference targets in each image of originals being scanned, including, at a minimum, a photographic gray scale as a tone and color reference and an accurate dimensional scale. If a target is included in each image, you may want to consider making access derivatives from the production masters that have the reference target(s) cropped out. This will reduce file size for the access files and present an uncluttered appearance to the images presented. In a high production environment, it may be more efficient to scan targets separately and do it once for each batch of originals. The one target per batch approach is acceptable as long as all settings and operation of the equipment remains consistent for the entire batch and any image processing is applied consistently to all the images. For scanners and digital cameras that have an "auto range" function, the single target per batch approach may not work because the tone and color settings will be vary due to the auto range function, depending on the density and color of each original. All targets should be positioned close to but clearly separated from the originals being scanned. There should be enough separation to allow easy cropping of the image of the original to remove the target(s) if desired, but not so much separation between the original and target(s) that it dramatically increases the file size. If it fits, orient the target(s) along the short dimension of originals, this will produce smaller file sizes compared to having the target(s) along the long dimension (for the same document, a more rectangular shaped image file is smaller than a squarer image). Smaller versions of targets can be created by cutting down the full-size targets. Do not make the tone and color targets so small that it is difficult to see and use the target during scanning (this is particularly important when viewing and working with low resolution image previews within scanning software). Make sure the illumination on the targets is uniform in comparison to the lighting of the item being scanned (avoid hot spots and/or shadows on the targets). Position targets to avoid reflections. If the originals are digitized under glass, place the tone and color reference targets under the glass as well. If originals are encapsulated or sleeved with polyester film, place the tone and color reference targets into a polyester sleeve. For digital copy photography set-ups using digital cameras, when digitizing items that have depth, it is important to make sure all reference targets are on the same level as the image plane -- for example, when digitizing a page in a thick book, make sure the reference targets are at the same height/level as the page being scanned. All types of tone and color targets will probably need to be replaced on a routine basis. As the targets are used they will accumulate dirt, scratches, and other surface marks that reduce their usability. It is best to replace the targets sooner, rather than using old targets for a longer period of time. Scale and dimensional references --Use an accurate dimensional scale as a reference for the size of original documents. For reflection scanning, scales printed on photographic paper are very practical given the thinness of the paper and the dimensional accuracy that can be achieved during printing. Consider purchasing IEEE Std 167A-1995 facsimile test targets and using the ruler portion of the target along the left-hand edge. Due to the relatively small platen size of most scanners, you may need to trim the ruler off the rest of the target. Different length scales can be created to match the size of various originals. The Kodak Q-13 (8" long) or Q-14 (14" long) color bars have a ruler along the top edge and can be used as a dimensional reference; however, while these are commonly used, they are not very accurate. For transmission scanning, consider using thin, clear plastic drafting scales/rulers. If these are too thick, create a ruler in a drafting/drawing application (black lines only on a white background) and print the ruler onto overhead transparency film on a laser printer using the highest possible resolution setting of the printer (600 ppi minimum).Compare printed scales to an accurate engineering ruler or tape measure to verify accuracy prior to using as a target. Again, different length scales can be created to match the size of various originals. -30- Targets for tone and color reproduction --Reference targets can be used to assist with adjusting scanners and image files to achieve objectively "good images" in terms of tone and color reproduction. This is particularly true with reflection scanning. Copy negatives and copy transparencies should be produced with targets, gray scales and color bars, so they can be printed or scanned to match the original. Unfortunately, scanning original negatives is much more subjective, and this is also the case for copy negatives and copy transparencies that do not contain targets. Reflection scanning --We recommend including a Kodak Q-13 (8" long) or Q-14 (14" long) Gray Scale (20 steps, 0.10 density increments, and density range from approximately 0.05 to 1.95) within the area scanned. The Kodak gray scales are made of black-and-white photographic paper and have proven to work well as a reference target, including:
The Kodak Color Control Patches (commonly referred to as color bars) from the Q-13 and Q-14 should only be used as a supplement to the gray scale, and never as the only target. The color bars are produced on a printing press and are not consistent. Also, the color bars do not provide the ability to assess color and tone reproduction for the full range of values from black-point to white-point. Other gray scales produced on black-and-white photographic papers could be used. However, many have a glossy surface that will tend to scratch easily and cause more problems with reflections. Also, while being monochrome, some gray scales are not neutral enough to be used as a target. IT8 color input targets (ex. Kodak Q-60) should not be used as scanning reference targets. IT8 targets are used for producing custom color profiles for scanning specific photographic papers, and therefore are produced on modern color photographic paper. Often, the neutral patches on IT8 targets are not neutral and the spectral response of the color photographic paper is not likely to match the response of most materials being scanned, therefore IT8 targets will not work well as a scanning reference. Also, there is little consistency from one IT8 target to another, even when printed on the same color photo paper. Consider using a calibrated densitometer or colorimeter to measure the actual visual density or L*A*B* values of each step of the gray scales used as reference targets. Then use a laser printer to print the actual densities and/or L*A*B* values (small font, white text on a gray background) and tape the information above the gray scale so the corresponding values are above each step; for the Kodak gray scales you may need to reprint the identifying numbers and letters for each step. This provides a quick visual reference within the digital image to the actual densities. Transmission scanning -- positives --Generally, when scanning transmissive positives, like original color transparencies and color slides, a tone and color reference target is usually not necessary. Most scanners are reasonably well calibrated for scanning color transparencies and slides (usually they are not so well calibrated for scanning negatives). Transparencies and slides have the highest density range of photographic materials routinely scanned. You may need to include within the scan area both a maximum density area of the transparency (typically an unexposed border) and a portion of empty platen to ensure proper auto ranging. Mounted slides can present problems, it is easy to include a portion of the mount as a maximum density area, but since it may not be easy to include a clear area in the scan, you should check highlight levels in the digital image to ensure no detail was clipped. Ideally, copy transparencies and slides were produced with a gray scale and color bars in the image along with the original. The gray scale in the image should be used for making tone and color adjustments. Caution, carefully evaluate using the gray scales in copy transparencies and slides to make sure that the illumination was even, there are no reflections on the gray scale, and the film was properly processed with no color cross-overs (the highlights and shadows have very different color casts). If any problems exist, you may have problems using the gray scale in the image, as tone and color adjustments will have to be done without relying on the gray scale. -31- For the best results with transmission scanning, it is necessary to control extraneous light known as flare. It may be necessary to mask the scanner platen or light box down to the just the area of the item being scanned or digitized. Generally, photographic step tablets on black-and-white film (see discussion on scanning negatives below) are not good as tone and color reference targets for color scanning. Transmission scanning -- negatives --We recommend including an uncalibrated Kodak Photographic Step Tablet (21 steps, 0.15 density increments, and density range of approximately 0.05 to 3.05), No. 2 (5" long) or No. 3 (10" long), within the scan area. The standard density range of a step tablet exceeds the density range of most originals that would be scanned, and the scanner can auto-range on the step tablet minimizing loss of detail in the highlight and/or shadow areas of the image. For production masters, we recommend the brightness range be optimized or matched to the density range of the originals. It may be necessary to have several step tablets, each with a different density range to approximately match the density range of the items being scanned; it is preferable the density range of the step tablet just exceeds the density range of the original. These adjusted step tablets can be produced by cutting off the higher density steps of standard step tablets. If originals have a very short or limited density range compared to the reference targets, this may result in quantization errors or unwanted posterization effects when the brightness range of the digital image is adjusted; this is particularly true for images from low-bit or 8-bit per channel scanners compared to high-bit scanners/cameras. Ideally, copy negatives were produced with a gray scale and/or color bars in the image along with the original. The gray scale in the image should be used for making tone and/or color adjustments. Caution, carefully evaluate using the gray scales in copy negatives to make sure that the illumination was even, there are no reflections on the gray scale, and for color film the film was properly processed with no color cross-overs (the highlights and shadows have very different color casts). If any problems exist with the quality of the copy negatives, you may have problems using the gray scale in the image, as tone and/or color adjustments will have to be done without relying on the gray scale. For the best results with transmission scanning, it is necessary to control extraneous light known as flare. It may be necessary to mask the scanner platen or light box down to the just the area of the item being scanned or digitized. This is also true for step tablets being scanned as reference targets. Also, due to the progressive nature of the step tablet, with the densities increasing along the length, it may be desirable to cut the step tablet into shorter sections and mount them out of sequence in an opaque mask; this will minimize flare from the low density areas influencing the high density areas. Consider using a calibrated densitometer to measure the actual visual and color density of each step of the step tablets used as reference targets. Use a laser printer to print the density values as gray letters against a black background and print onto overhead transparency film, size and space the characters to fit adjacent to the step tablet. Consider mounting the step tablet (or a smaller portion of the step tablet) into an opaque mask with the printed density values aligned with the corresponding steps. This provides a quick visual reference within the digital image to the actual densities. IV. IMAGING WORKFLOWAdjusting Image Files:There is a common misconception that image files saved directly from a scanner or digital camera are pristine or unmolested in terms of the image processing. For almost all image files this is simply untrue. Only "raw" files from scanners or digital cameras are unadjusted, all other digital image files have a range of image processing applied during scanning and prior to saving in order to produce digital images with good image quality. Because of this misconception, many people argue you should not perform any post-scan or post-capture adjustments on image files because the image quality might be degraded. We disagree. The only time we would recommend saving unadjusted files is if they meet the exact tone and color reproduction, sharpness, and other image quality parameters that you require. Otherwise, we recommend doing minor post-scan adjustment to optimize image quality and bring all images to a common rendition. Adjusting production master files to a common rendition provides significant benefits in terms of being able to batch process and treat all images in the same manner. Well designed and calibrated scanners and digital cameras can produce image files that require little -32- or no adjustment, however, based on our practical experience, there are very few scanners/cameras that are this well designed and calibrated.Also, some people suggest it is best to save raw image files, because no "bad" image processing has been applied. This assumes you can do a better job adjusting for the deficiencies of a scanner or digital camera than the manufacturer, and that you have a lot of time to adjust each image. Raw image files will not look good on screen, nor will they match the appearance of originals. Raw image files cannot be used easily; this is true for inaccurate unadjusted files as well. Every image, or batch of images, will have to be evaluated and adjusted individually. This level of effort will be significant, making both raw files and inaccurate unadjusted files inappropriate for production master files. We believe the benefits of adjusting images to produce the most accurate visual representation of the original outweigh the insignificant data loss (when processed appropriately), and this avoids leaving images in a raw unedited state. If an unadjusted/raw scan is saved, future image processing can be hindered by unavailability of the original for comparison. If more than one version is saved (unadjusted/raw and adjusted), storage costs may be prohibitive for some organizations, and additional metadata elements would be needed. In the future, unadjusted or raw images will need to be processed to be used and to achieve an accurate representation of the originals and this will be difficult to do. Overview:We recommend using the scanner/camera controls to produce the most accurate digital images possible for a specific scanner or digital camera. Minor post-scan/post-capture adjustments are acceptable using an appropriate image processing workflow that will not significantly degrade image quality. We feel the following goals and tools are listed in priority order of importance
The following sections address various types of image adjustments that we feel are often needed and are appropriate. The amount of adjustment needed to bring images to a common rendition will vary depending on the original, on the scanner/digital camera used, and on the image processing applied during digitization (the specific scanner or camera settings). Scanning aimpoints --One approach for ensuring accurate tone reproduction (the appropriate distribution of the tones) for digital images is to place selected densities on a gray scale reference target at specific digital levels or aimpoints. Also, for color images it is possible to improve overall color accuracy of the image by neutralizing or eliminating color biases of the same steps of the gray scale used for the tone reproduction aimpoints. This approach is based on working in a gray-balanced color space, independent of whether it is an ICC color managed workflow or not. -33- In a digital image, the white point is the lightest spot (highest RGB levels for color files and lowest % black for grayscale files) within the image, the black point is the darkest spot (lowest RGB levels for color files and highest % black for grayscale files), and a mid-point refers to a spot with RGB levels or % black in the middle of the range. Generally, but not always, the three aimpoints correspond to the white-point, a mid-point, and the black-point within a digital image, and they correspond to the lightest patch, a mid-density patch, and the darkest patch on the reference gray scale within the digital image. This assumes the photographic gray scale has a larger density range than the original being scanned. In addition to adjusting the distribution of the tones, the three aimpoints can be used for a three point neutralization of the image to eliminate color biases in the white-point, a mid-point, and the black-point. The aimpoints cited in this section are guidelines only. Often it is necessary to vary from the guidelines and use different values to prevent clipping of image detail or to provide accurate tone and color reproduction.
Since the aimpoints rely on a photographic gray scale target, they are only applicable when a gray scale is used as a reference. If no gray scale is available (either scanned with the original or in a copy transparency/negative), the Kodak Color Control Patches (color bars) can be used and alternative aimpoints for the color bars are provided. We recommend using a photographic gray scale and not relying on the color bars as the sole target. Many image processing applications have automatic and manual "place white-point" and "place black-point" controls that adjust the selected areas to be the lightest and darkest portions of the image, and that will neutralize the color in these areas as well as. Also, most have a "neutralize mid-point" control, but usually the tonal adjustment for brightness has to be done separately with a "curves", "levels", "tone curve", etc, control. The better applications will let you set the specific RGB or % black levels for the default operation of the place white-point, place black-point, and neutralize mid-point controls. Typically, both the brightness placement (for tone reproduction) and color neutralization to adjust the color balance (for color reproduction) should be done in the scanning step and/or as a post-scan adjustment using image processing software. A typical manual workflow in Adobe Photoshop is black-point placement and neutralization -34- (done as a single step, control set to desired neutral level prior to use), white-point placement and neutralization (done as a single step, control set to desired neutral level prior to use), mid-point neutralization (control set to neutral value prior to use), and a gamma correction to adjust the brightness of the mid point (using levels or curves). For grayscale images the mid-point neutralization step is not needed. The tools in scanner software and other image processing software should allow for a similar approach, the sequence of steps may need to be varied to achieve best results.The three point tone adjustment and color neutralization approach does not guarantee accurate tone and color reproduction. It works best with most scanners with reflection scanning, but it can be difficult to achieve good tone and color balance when scanning copy negatives/transparencies. It can be very difficult to produce an accurate digital image reproduction from color copy negatives/transparencies that exhibit color cross-over or other defects such as under/over exposure or a strong color cast. The three point neutralization approach will help minimize these biases, but may not eliminate the problems entirely. If the overall color balance of an image is accurate, using the three point neutralization to adjust the color reproduction may cause the color balance of the shades lighter and darker than the mid-point to shift away from being neutral. For accurate color images that need to have just the tone distribution adjusted, apply levels or curves adjustments to the luminosity information only, otherwise the overall color balance is likely to shift. When scanning photographic prints it is important to be careful about placing the black point, in some cases the print being scanned will have a higher density than the darkest step of the photographic gray scale. In these cases, you should use a lighter aimpoint for the darkest step of the gray scale so the darkest portion of the image area is placed at the normal aimpoint value (for RGB scans, the shadow area on the print may not be neutral in color and the darkest channel should be placed at the normal aimpoint). Occasionally, objects being scanned may have a lighter value than the lightest step of the photographic gray scale, usually very bright modern office papers or modern photo papers with a bright-white base. In these cases, you should use a darker aimpoint for the lightest step of the gray scale so the lightest portion of the image area is placed at the normal aimpoint value (for RGB scans, the lightest area of the object being scanned may not be neutral in color and the lightest channel should be placed at the normal aimpoint). Aimpoints may need to be altered not only for original highlight or shadow values outside the range of the grayscale, but also deficiencies in lighting, especially when scanning photographic intermediates. Excessive flare, reflections, or uneven lighting may need to be accounted for by selecting an alternate value for a patch, or selecting a different patch altogether. At no point should any of the values in any of the color channels of the properly illuminated original fall outside the minimum or maximum values indicated below for scanning without a grayscale. The aimpoints recommended in the 1998 NARA guidelines have proven to be appropriate for monitor display and for printed output on a variety of printers. The following table provides slightly modified aimpoints to minimize potential problems when printing the image files; the aimpoints described below create a slightly compressed tonal scale compared to the aimpoints in the 1998 guidelines. All aimpoint measurements and adjustments should be made using either a 5x5 pixel (25 pixels total) or 3x3 pixel (9 pixels total) sample. Avoid using a point-sample or single pixel measurement. -35- Aimpoints for Photographic Gray Scales
-36- Alternative Aimpoints for Kodak Color Control Patches (color bars)
Aimpoint variability --For the three points that have been neutralized and placed at the aimpoint values: no more than +/- 3 RGB level variance from aimpoints and no more than 3 RGB level difference in the individual channels within a patch for RGB scanning and no more than +/- 1% level variance from the aimpoints in % black for grayscale scanning. Again, the image sampler (in Adobe Photoshop or other image processing software) should be set to measure an average of either 5x5 pixels or 3x3 pixels when making these measurements, point sample or single pixel measurements should not be used. Other steps on the gray scale may, and often will, exhibit a higher degree of variation. Scanner calibration, approaches to scanning/image processing workflow, color management, and variation in the target itself can all influence the variability of the other steps and should be used/configured to minimize the variability for the other steps of the gray scale. Usually the other steps of the gray scale will be relatively consistent for reflection scanning, and significantly less consistent when scanning copy negatives and copy transparencies. Minimum and maximum levels --The minimum and maximum RGB or % black levels when scanning materials with no reference gray scale or color patches, such as original photographic negatives:
Color Management Background:Digitization is the conversion of analog color and brightness values to discrete numeric values. A number, or set of numbers, designates the color and brightness of each pixel in a raster image. The rendering of these numerical -37- values, however, is very dependent on the device used for capture, display or printing. Color management provides a context for objective interpretation of these numeric values, and helps to compensate for differences between devices in their ability to render or display these values, within the many limitations inherent in the reproduction of color and tone.Color management does not guarantee the accuracy of tone and color reproduction. We recommend color management not be used to compensate for poor imaging and/or improper device calibration. As described above, it is most suitable to correct for color rendering differences from device to device. Every effort should be made to calibrate imaging devices and to adjust scanner/digital camera controls to produce the most accurate images possible in regard to tone and color reproduction (there are techniques for rescuing poorly captured images that make use of profile selection, particularly synthesized profiles, that will not be discussed here. For further information see the writings of Dan Margulis and Michael Kieran). Calibration will not only improve accuracy of capture, but will also ensure the consistency required for color management systems to function by bringing a device to a stable, optimal state. Methods for calibrating hardware vary from device to device, and are beyond the scope of this guidance. International Color Consortium (ICC) color management system --Currently, ICC-based color management is the most widely implemented approach. It consists of four components that are integrated into software (both the operating system and applications):
Profiles --Profiles are sets of numbers, either a matrix or look up table (LUT), that describe a color space (the continuous spectrum of colors within the gamut, or outer limits, of the colors available to a device) by relating color descriptions specific to that color space to a PCS. Although files can be saved with any ICC-compliant profile that describes an input device, output device or color space (or with no profile at all), it is best practice to adjust the color and tone of an image to achieve an accurate rendition of the original in a common, well-described, standard color space. This minimizes future effort needed to transform collections of images, as well as streamlines the workflow for repurposing images by promoting consistency. Although there may be working spaces that match more efficiently with the gamut of a particular original, maintaining a single universal working space that covers most input and output devices has additional benefits. Should the profile tag be lost from an image or set of images, the proper profile can be correctly assumed within the digitizing organization, and outside the digitizing organization it can be reasonably found through trial and error testing of the small set of standard workspaces. Some have argued saving unedited image files in the input device space (profile of the capture device) provides the least compromised data and allows a wide range of processing options in the future, but these files may not be immediately usable and may require individual or small batch transformations. The data available from the scanner has often undergone some amount of adjusting beyond the operator's control, and may not be the best representation of the original. We recommend the creation of production master image files using a standard color space that will be accurate in terms of color and tone reproduction when compared to the original. The RGB color space for production master files should be gray-balanced, perceptually uniform, and sufficiently large to encompass most input and output devices, while not wasting bits on unnecessary color descriptions. Color spaces that describe neutral gray with equal amounts of red, green and blue are considered to be gray-balanced. A gamma of 2.2 is considered perceptually uniform because it approximates the human visual response to stimuli. -38- The Adobe RGB 1998 color space profile adequately meets these criteria and is recommended for storing RGB image files. Adobe RGB 1998 has a reasonably large color gamut, sufficient for most purposes when saving files as 24-bit RGB files (low-bit files or 8-bits per channel). Using larger gamut color spaces with low-bit files can cause quantization errors, therefore wide gamut color spaces are more appropriate when saving high-bit or 48-bit RGB files. Gray Gamma 2.2 (available in Adobe products) is recommended for grayscale images. An ideal workflow would be to scan originals with a calibrated and characterized device, assign the profile of that device to the image file, and convert the file to the chosen workspace (Adobe RGB 1998 for color or Gray Gamma 2.2 for grayscale). Not all hardware and software combinations produce the same color and tonal conversion, and even this workflow will not always produce the best results possible for a particular device or original. Different scanning, image processing and printing applications have their own interpretation of the ICC color management system, and have varying controls that produce different levels of quality. It may be necessary to deviate from the normal, simple color managed workflow to achieve the best results. There are many options possible to achieve the desired results, many of which are not discussed here because they depend on the hardware and software available. Rendering intents --When converting images from one color space to another, one of four rendering intents must be designated to indicate how the mismatch of size and shape of source and destination color spaces is to be resolved during color transformations -- perceptual, saturation, relative colorimetric, or absolute colorimetric. Of the four, perceptual and relative colorimetric intents are most appropriate for creation of production master files and their derivatives. In general, we have found that perceptual intent works best for photographic images, while relative colorimetric works best for images of text documents and graphic originals. It may be necessary to try both rendering intents to determine which will work best for a specific image or group of images. When perceptual intent is selected during a color transformation, the visual relationships between colors are maintained in a manner that looks natural, but the appearance of specific colors are not necessarily maintained. As an example, when printing, the software will adjust all colors described by the source color space to fit within a smaller destination space (printing spaces are smaller than most source or working spaces). For images with significant colors that are out of the gamut of the destination space (usually highly saturated colors), perceptual rendering intent often works best. Relative colorimetric intent attempts to maintain the appearance of all colors that fall within the destination space, and to adjust out-of-gamut colors to close, in-gamut replacements. In contrast to absolute colorimetric, relative colorimetric intent includes a comparison of the white points of the source and destination spaces and shifts all colors accordingly to match the brightness ranges while maintaining the color appearance of all in-gamut colors. This can minimize the loss of detail that may occur with absolute colorimetric in saturated colors if two different colors are mapped to the same location in the destination space. For images that do not contain significant out of gamut colors (such as near-neutral images of historic paper documents), relative colorimetric intent usually works best. Color Management Modules --The CMM uses the source and destination profiles and the rendering intent to transform individual color descriptions between color spaces. There are several CMMs from which to select, and each can interact differently with profiles generated from different manufacturers' software packages. Because profiles cannot provide an individual translation between every possible color, the CMM interpolates values using algorithms determined by the CMM manufacturer and each will give varying results. Profiles can contain a preference for the CMM to be used by default. Some operating systems allow users to designate a CMM to be used for all color transformations that will override the profile tag. Both methods can be superceded by choosing a CMM in the image processing application at the time of conversion. We recommend that you choose a CMM that produces acceptable results for project-specific imaging requirements, and switch only when unexpected transformations occur. Image Processing:After capture and transformation into one of the recommended color spaces (referred to as a "working space" at this point in the digitization process), most images require at least some image processing to produce the best digital rendition of the original. The most significant adjustments are color correction, tonal adjustment and sharpening. These processes involve data loss and should be undertaken carefully since they are irreversible once -39- the file is saved. Images should initially be captured as accurately as possible; image processing should be reserved for optimizing an image, rather than for overcoming poor imaging.Color correction and tonal adjustments --Many tools exist within numerous applications for correcting image color and adjusting the tonal scale. The actual techniques of using them are described in many excellent texts entirely devoted to the subject. There are, however, some general principles that should be followed.
Sharpening --Digitization utilizes optics in the capture process and the sharpness of different imaging systems varies. Most scans will require some amount of sharpening to reproduce the apparent sharpness of the original. Generally, the higher the spatial resolution, the less sharpening that will be needed. As the spatial resolution reaches a level that renders fine image detail, such as image grain in a photograph, the large features of an image will appear sharp and will not require additional sharpening. Conversely, lower resolution images will almost always need some level of sharpening to match the appearance of the original. Sharpening tools available from manufacturers use different controls, but all are based on increasing contrast on either side of a defined brightness difference in one or more channels. Sharpening exaggerates the brightness relationship between neighboring pixels with different values, and this process improves the perception of sharpness. Sharpening of the production master image files should be done conservatively and judiciously; generally it is better to under-sharpen than to over-sharpen. Over-sharpening is irreversible and should be avoided, but it is not objectively measurable. Often over-sharpening will appear as a lighter halo between areas of light and dark. We recommend using unsharp mask algorithms, rather than other sharpening tools, because they provide the best visual results and usually give greater control over the sharpening parameters. Also --
Sample Image Processing Workflow:The following provides a general approach to image processing that should help minimize potential image quality defects due to various digital image processing limitations and errors. Depending on the scanner/digital camera, scan/capture software, scanner/digital camera calibration, and image processing software used for post-scan adjustment and/or correction, not all steps may be required and the sequence may need to be modified. Fewer steps may be used in a high-volume scanning environment to enhance productivity, although this may result in less accurate tone and color reproduction. You can scan a target, adjust controls based on the scan of the target, and then use the same settings for all scans -- this approach should work reasonably well for reflection -40- scanning, but will be much harder to do when scanning copy negatives, copy transparencies, original negatives, and original slides/transparencies.Consider working in high-bit mode (48-bit RGB or 16-bit grayscale) for as much of the workflow as possible, if the scanner/digital camera and software is high-bit capable and your computer has enough memory and speed to work with the larger files. Conversion to 24-bit RGB or 8-bit grayscale should be done at the end of the sequence. The post-scan sequence is based on using Adobe Photoshop 7 software.
Again, the actual image processing workflow will depend on the originals being digitized, the equipment and software being used, the desired image parameters, and the desired productivity. Adjust the image processing workflow for each specific digitization project. V. DIGITIZATION SPECIFICATIONS FOR RECORD TYPESThe intent of the following tables is to present recommendations for scanning a variety of original materials in a range of formats and sizes. The tables are broken down into six main categories: textual documents (including graphic illustrations/artworks/originals, maps, plans, and oversized documents); reflective photographic formats (prints); transmissive photographic formats (negatives, slides, transparencies); reflective aerial photographic formats (prints); transmissive aerial photographic formats (negatives, positives); graphic materials (graphic illustrations, drawings, posters); and objects and artifacts. Because there are far too many formats and document characteristics for comprehensive discussion in these guidelines, the tables below provide scanning recommendations for the most typical or common document types and photographic formats found in most cultural institutions. The table for textual documents is organized around physical characteristics of documents which influence capture decisions. The recommended scanning specifications for text support the production of a scan that can be reproduced as a legible facsimile at the same size as the original (at 1:1, the smallest significant character should be legible). For photographic materials, the tables are organized around a range of formats and sizes that influence capture decisions. NOTE: We recommend digitizing to the original size of the records following the resolution requirements cited in the tables (i.e. no magnification, unless scanning from various intermediates). Be aware, many Windows applications will read the resolution of image files as 72 ppi by default and the image dimensions will be incorrect. Workflow requirements, actual usage needs for the image files, and equipment limitations will all be influential factors for decisions regarding how records should be digitized. The recommendations cited in the following section and charts, may not always be appropriate. Again, the intent for these Technical Guidelines is to offer a range of options and actual approaches for digitizing records may need to be varied. -42- Cleanliness of work area, digitization equipment, and originals --Keep work area clean. Scanners, platens, and copy boards will have to be cleaned on a routine basis to eliminate the introduction of extraneous dirt and dust to the digital images. Many old documents tend to be dirty and will leave dirt in the work area and on scanning equipment. See sample handling guidelines, Appendix E, Records Handling for Digitization, for safe and appropriate handling of original records. Photographic originals may need to be carefully dusted with a lint-free, soft-bristle brush to minimize extraneous dust (just as is done in a traditional darkroom or for copy photography). Cropping --We recommend the entire document be scanned, no cropping allowed. A small border should be visible around the entire document or photographic image. Careful placement of documents on flatbed scanners may require the originals to be away from platen edge to avoid cropping. For photographic records -- If there is important information on a mount or in the border of a negative, then scan the entire mount and the entire negative including the full border. Otherwise, scan photographs so there is only a small border around just the image area. Backing reflection originals --We recommend backing all originals with a bright white opaque paper (such as a smooth finish cover stock), occasionally, an off-white or cream-colored paper may complement the original document and should be used. For most documents, the bright white backing will provide a lighter shade for scanner auto-ranging and minimize clipping of detail in the paper of the original being scanned. In the graphic arts and photography fields, traditionally items being copied to produce line negatives (somewhat equivalent to 1-bit scanning) have been backed with black to minimize bleed-through from the back. However, this can create very low contrast and/or grayed-out digital images when the paper of the original document is not opaque and when scanning in 8-bit grayscale or 24-bit RGB color. Backing with white paper maximizes the paper brightness of originals and the white border around the originals is much less distracting.
Scanning encapsulated or sleeved originals --Scanning/digitizing originals that have been encapsulated or sleeved in polyester film can present problems -- the visual appearance is changed and the polyester film can cause Newton's rings and other interference patterns. The polyester film changes the visual appearance of the originals, increasing the visual density. You can compensate for the increase by placing the tone and color reference target (photographic gray scale) into a polyester sleeve (this will increase the visual density of the reference target by the same amount) and scan using the normal aimpoints. Interference patterns known as Newton's rings are common when two very smooth surfaces are placed in contact, such as placing encapsulated or sleeved documents onto the glass platen of a flatbed scanner; the susceptibility and severity of Newton's rings varies with the glass used, with coatings on the glass, and with humidity in the work area. These patterns will show up in the digital image as multi-colored concentric patterns of various shapes and sizes. Also, we have seen similar interference patterns when digitizing encapsulated documents on a digital copy stand using a scanning camera back, even when there is nothing in contact with the encapsulation. Given the complex nature of these interference patterns, it is not practical to scan and then try to clean-up the image. Some scanners use special glass, known as anti-Newton's ring glass, with a slightly wavy surface to prevent Newton's rings from forming. -43- To prevent interference patterns, use scanners that have anti-Newton's ring glass and avoid scanning documents in polyester film whenever practical and possible. Some originals may be too fragile to be handled directly and will have to be scanned in the polyester encapsulation or sleeve. One option is to photograph the encapsulated/sleeved document first and then scan the photographic intermediate; generally this approach works well, although we have seen examples of interference patterns on copy transparencies (to a much lesser degree compared to direct digitization). Embossed seals --Some documents have embossed seals, such as notarized documents, or wax seals that are an intrinsic legal aspect of the documents. Most scanners are designed with lighting to minimize the three dimensional aspects of the original documents being scanned, in order to emphasize the legibility of the text or writing. In most cases, embossed seals or the imprint on a wax seal will not be visible and/or legible in digital images from these scanners, and this raises questions about the authenticity of the digital representation of the documents. Some scanners have a more directed and/or angled lighting configuration that will do a better job reproducing embossed seals. With a few scanners, the operator has the control to turn off one light and scan using lighting from only one direction, this approach will work best for documents with embossed or wax seals. Similarly, when using a digital copy stand, the lighting can be set up for raking light from one direction (make sure the light is still even across the entire document). When working with unidirectional lighting, remember to orient the document so the shadows fall at the bottom of the embossment/seal and of the document.
Compensating for minor deficiencies --Scanning at higher than the desired resolution and resampling to the final resolution can minimize certain types of minor imaging deficiencies, such as minor color channel misregistration, minor chromatic aberration, and low to moderate levels of image noise. Conceptually, the idea is to bury the defects in the fine detail of the higher resolution scan, which are then averaged out when the pixels are resampled to a lower resolution. This approach should not be used as a panacea for poorly performing scanners/digital cameras, generally it is better to invest in higher quality digitization equipment. Before using this approach in production, you should run tests to determine there is sufficient improvement in the final image quality to justify the extra time and effort. Generally, we recommend over-scanning at 1.5 times the desired final resolution, as an example -- 400 ppi final x 1.5 = 600 ppi scan resolution. Scanning text --Guidelines have been established in the digital library community that address the most basic requirements for preservation digitization of text-based materials, this level of reproduction is defined as a "faithful rendering of the underlying source document" as long as the images meet certain criteria. These criteria include completeness, image quality (tonality and color), and the ability to reproduce pages in their correct (original) sequence. As a faithful rendering, a digital master will also support production of a printed page facsimile that is a legible facsimile when produced in the same size as the original (that is 1:1). See the Digital Library Federation's Benchmark for Faithful Digital Reproductions of Monographs and Serials at https://www.diglib.org/standards/bmarkfin.htm for a detailed discussion. The Quality Index (QI) measurement was designed for printed text where character height represents the measure of detail.
Cornell University has developed a formula for QI based on translating the Quality Index method developed for preservation
microfilming standards to the digital world. The QI formula for scanning text relates quality (QI) to character size (h) in
mm and resolution (dpi). As in the preservation microfilming standard, the digital QI formula forecasts levels of image quality:
barely legible (3.0), marginal (3.6), good (5.0), and excellent (8.0). However, manuscripts and other non-textual material
representing distinct edge-based graphics, such as maps, sketches, and engravings, offer no equivalent fixed metric. For many
such documents, a better representation of detail would be the width of the finest line, stroke, or marking that must be captured
in the digital surrogate. To fully represent such a detail, at least 2 pixels should cover it. (From Moving Theory into Practice:
-44- Digital Imaging for Libraries and Archives, Anne R. Kenney and Oya Y. Rieger, editors and principal authors. Research Libraries Group, Mountain View, CA: 2000).Optical character recognition, the process of converting a raster image of text into searchable ASCII data, is not addressed in this document. Digital images should be created to a quality level that will facilitate OCR conversion to a specified accuracy level. This should not, however, compromise the quality of the images to meet the quality index as stated in this document. Scanning oversized --Scanning oversized originals can produce very large file sizes. It is important to evaluate the need for legibility of small significant characters in comparison to the overall file size when determining the appropriate scanning resolution for oversized originals. Scanning photographs --The intent in scanning photographs is to maintain the smallest significant details. Resolution requirements for photographs are often difficult to determine because there is no obvious fixed metric for measuring detail, such as quality index. Additionally, accurate tone and color reproduction in the scan play an equal, if not more, important role in assessing the quality of a scan of a photograph. At this time, we do not feel that there is a valid counterpart for photographic materials to the DLF benchmarks for preservation digitization of text materials. The recommended scanning specifications for photographs support the capture of an appropriate level of detail from the format, and, in general, support the reproduction, at a minimum, of a high-quality 8"x10" print of the photograph. For photographic formats in particular, it is important to carefully analyze the material prior to scanning, especially if it is not a camera original format. Because every generation of photographic copying involves some quality loss, using intermediates, duplicates, or copies inherently implies some decrease in quality and may also be accompanied by other problems (such as improper orientation, low or high contrast, uneven lighting, etc.). For original color transparencies, the tonal scale and color balance of the digital image should match the original transparency being scanned to provide accurate representation of the image. Original photographic negatives are much more difficult to scan compared to positive originals (prints, transparencies, slides, etc.), with positives there is an obvious reference image that can be matched and for negatives there is not. When scanning negatives, for production master files the tonal orientation should be inverted to produce a positive image. The resulting image will need to be adjusted to produce a visually pleasing representation. Digitizing negatives is very analogous to printing negatives in a darkroom and it is very dependent on the photographer's/technician's skill and visual literacy to produce a good image. There are few objective metrics for evaluating the overall representation of digital images produced from negatives. When working with scans from negatives, care is needed to avoid clipping image detail and to maintain highlight and shadow detail. The actual brightness range and levels for images from negatives are very subject dependent, and images may or may not have a full tonal range. Often it is better to scan negatives in positive mode (to produce an initial image that appears negative) because frequently scanners are not well calibrated for scanning negatives and detail is clipped in either the highlights and/or the shadows. After scanning, the image can be inverted to produce a positive image. Also, often it is better to scan older black-and-white negatives in color (to produce an initial RGB image) because negatives frequently have staining, discolored film base, retouching, intensification, or other discolorations (both intentional and the result of deterioration) that can be minimized by scanning in color and performing an appropriate conversion to grayscale. Evaluate each color channel individually to determine the channel which minimizes the appearance of any deterioration and optimizes the monochrome image quality, use that channel for the conversion to a grayscale image. Scanning intermediates --Adjust scaling and scan resolution to produce image files that are sized to the original document at the appropriate resolution, or matched to the required QI (legibility of the digital file may be limited due to loss of legibility during the photographic copying process) for text documents. For copy negatives (B&W and color), if the copy negative has a Kodak gray scale in the image, adjust the scanner settings using the image of the gray scale to meet the above requirements. If there is no gray scale, the scanner software should be used to match the tonal scale of the digital image to the density range of the specific negative -45- being scanned to provide an image adjusted for monitor representation.For color copy transparencies and color microfilm, if the color intermediate has a Kodak gray scale in the image, adjust the scanner settings using the image of the gray scale to meet the above requirements. If there is no grayscale, the scanner software should be used to match the tonal scale and color balance of the digital image to the specific transparency being scanned to provide an accurate monitor representation of the image on the transparency. There are more specific details regarding scanning photographic images from intermediates in the notes following the photo scanning tables. Generally, for
Scanning microfilm --When scanning microfilm, often the desire is to produce images with legible text. Due to photographic limitations of microfilm and the variable quality of older microfilm, it may not be possible to produce what would normally be considered reproduction quality image files. Your scanning approach may vary from the recommendations cited here for textual records and may be more focused on creating digital images with reasonable legibility. For B&W microfilm, scanner software should be used to match the tonal scale of the digital image to the density range of the specific negative or positive microfilm being scanned. Example: the minimum density of negative microfilm placed at a maximum % black value of 97% and the high density placed at a minimum % black value of 3%. 2 From -- Digital and Photographic Imaging Services Price Book, Rieger Communications Inc, Gaithersburg, MD, 2001 -- "In our opinion and experience, you will not achieve better results . . . than can be obtained from the scan sizes listed . . . Due to the nature of pixel capture, scanning larger does make a difference if the scan is to be used in very high magnification enlargements. Scan size should not be allowed to fall below 100 DPI at final magnification for quality results in very large prints." -46- Illustrations of Record Types:Textual Documents --
Documents with well defined printed type (e.g. typeset, typed, laser printed, etc.), with high inherent contrast between the ink of the text and the paper background, with clean paper (no staining or discoloration), and no low contrast annotations (such as pencil writing) can be digitized either as a 1-bit file (shown on left) with just black and white pixels (no paper texture is rendered), as an 8-bit grayscale file (shown in the center) with gray tones ranging from black to white, or as a 24-bit RGB color image file (shown on right) with a full range of both tones and colors (notice the paper of the original document is an off-white color). [document- President Nixon's Daily Diary, page 3, 7/20/1969, NARA -- Presidential Libraries -- Nixon Presidential Materials Staff]
Often grayscale imaging works best for older documents with poor legibility or diffuse characters (e.g. carbon copies, Thermofax/Verifax, etc.), with handwritten annotations or other markings, with low inherent contrast between the text and the paper background, with staining or fading, and with halftone illustrations or photographs included as part of the documents. Many textual documents do not have significant color information and grayscale images will be smaller to store compared to color image files. The document above on the left was scanned directly using a book scanner and the document on the right was scanned from 35mm microfilm using a grayscale microfilm scanner. [document on left -- from RG 105, Records of the Bureau of Refugees, Freedmen, and Abandoned Lands, NARA -- Old Military and Civil LICON; document on the right -- 1930 Census Population Schedule, Milwaukee City, WI, Microfilm Publication T626, Roll 2594, sheet 18B] -47-
For textual documents where color is important to the interpretation of the information or content, or there is a desire to produce the most accurate representation, then scanning in color is the most appropriate approach. The document above on the left was scanned from a 4"x5" color copy transparency using a film scanner and the document on the right was scanned directly on a flatbed scanner. [document on left -- Telegram from President Lincoln to General Grant, 07/11/1864, RG 107 Records of the Office of the Secretary of War, NARA -- Old Military and Civil LICON; document on the right -- Brown v. Board, Findings of Fact, 8/3/1951, RG 21 Records of the District Courts of the United States, NARA -- Central Plains Region(Kansas City)] Oversized records --
Generally, oversized refers to documents of any type that do not fit easily onto a standard flatbed scanner. The above parchment document on the left and the large book on the right were digitized using a copy stand with a large-format camera and a scanning digital camera back. Books and other bound materials can be difficult to digitize and often require appropriate types of book cradles to prevent damaging the books. [document on the left -- Act Concerning the Library for the Use of both Houses of Congress, Seventh Congress of the US, NARA -- Center for Legislative Archives; document on the right -- Lists of Aliens Admitted to Citizenship 1790-1860, US Circuit and District Courts, District of South Carolina, Charleston, NARA -- Southeast Region (Atlanta)] -48-
Maps, architectural plans, engineering plans, etc. are often oversized. Both of the above documents were scanned using a digital copy stand. [document on left -- Map of Illinois, 1836, RG 233 Records of the U.S. House of Representatives, NARA -- Center for Legislative Archives; document on right -- The Mall and Vicinity, Washington, Sheet # 35-23, RG 79 Records of the National Capitol Parks Commission, NARA -- Special Media Archives Services Division] Photographs --
There is a wide variety of photographic originals and different types will require different approaches to digitizing. Above on the left is a scan of a modern preservation-quality film duplicate negative of a Mathew Brady collodion wet-plate negative. Since the modern duplicate negative is in good condition and has a neutral image tone, the negative was scanned as a grayscale image on a flatbed scanner. The photograph in the center is a monochrome print from the 1940s that was scanned in color on a flatbed scanner because the image tone is very warm and there is some staining on the print; many older "black-and-white" prints have image tone and it may be more appropriate to scan these monochrome prints in color. The photo on the right is a 4"x5" duplicate color transparency and was scanned in color using a flatbed scanner. [photograph on left -- Gen. Edward O.C. Ord and family, ca. 1860-ca. 1865, 111-B-5091, RG 111 Records of the Office of the Chief Signal Officer, NARA -- Special Media Archives Services Division; photograph in center -- Alonzo Bankston, electric furnace operator, Wilson Nitrate Plant, Muscle Shoals, Alabama, 1943, RG 142 Records of the Tennessee Valley Authority, NARA -- Southeast Region (Atlanta); photograph on right -- Launch of the Apollo 11 Mission, 306-AP-A11-5H-69-H-1176, RG 306 Records of the U.S. Information Agency, NARA -- Special Media Archives Services Division] -49- Aerial photographs --
Aerial photographs have a lot of fine detail, often require a high degree of enlargement, and may require a higher degree of precision regarding the dimensional accuracy of the scans (compared to textual documents or other types of photographs). The above two grayscale images were produced by scanning film duplicates of the original aerial negatives using a flatbed scanner. The original negative for the image on the left was deteriorated with heavy staining and discoloration, if the original was to be scanned one option would be to scan in color and then to convert to grayscale from an individual color channel that minimizes the appearance of the staining. [photograph on left -- Roosevelt Inauguration, 01/1941, ON27740, RG373 Records of the Defense Intelligence Agency, NARA -- Special Media Archives Services Division; photograph on the right -- New Orleans, LA, French Quarter, 12-15-1952, ON367261/10280628, RG 145 Records of the Farm Service Agency, NARA -- Special Media Archives Services Division] Graphic illustrations/artwork/originals --
Some originals have graphic content, and will often have some text information as well. The above examples, a poster on the left, a political cartoon in the center, and an artist's rendition on the right all fall into this category. The most appropriate equipment to digitize these types of records will vary, and will depend on the size of the originals and their physical condition. [document on left -- "Loose Lips Might Sink Ships", 44-PA-82, RG 44 Records of the Office of Government Reports, NARA -- Special Media Archives Services Division; document in center -- "Congress Comes to Order" by Clifford K. Berryman, 12/2/1912, Washington Evening Star, D-021, U.S. Senate Collection, NARA -- Center for Legislative Archives; document on right -- Sketch of Simoda (Treaty of Kanagawa, TS 183 AO, RG 11 General Records of the United States Government, NARA -- Old Military and Civil Records LICON] -50- Objects and artifacts --
Objects and artifacts can be photographed using either film or a digital camera. If film is used, then the negatives, slides/transparencies, or prints can be digitized. The images on the left were produced using a digital camera and the image on the right was produced by digitizing a 4"x5" color transparency. [objects on top left -- Sword and scabbard, Gift from King of Siam, RG 59 General Records of the Department of State, NARA -- Civilian Records LICON; object on bottom left -- from Buttons Commemorating the Launch of New Ships at Philadelphia Navy Yard, RG 181 Records of the Naval Districts and Shore Establishments, NARA -- Mid Atlantic Region (Center City Philadelphia); objects on right -- Chap Stick tubes with hidden microphones, RG 460 Records of the Watergate Special Prosecution Force, NARA -- Special Access/FOIA LICON] -51-
-52-
Duplicate negatives and copy negatives can introduce problems in recommending scanning specifications, particularly if there is no indication of original size. Any reduction or enlargement in size must be taken into account, if possible. In all cases, reproduction to original size is ideal. For copy negatives or -53- transparencies of prints, use the specifications for that print size. For duplicates (negatives, slides, transparencies), match the original size. However, if original size is not known, the following recommendations are supplied:
On the left is an image of a historic black-and-white film negative that was scanned in color with a positive tonal orientation (the digital image appears the same as the original negative), this represents a reasonably accurate rendition of the original negative. The middle grayscale image shows a direct inversion of the tones, and as shown here, often a direct inversion of a scan of a negative will not produce a well-rendered photographic image. The image on the right illustrates an adjusted version where the brightness and contrast of the image has been optimized (using "Curves" and "Levels" in Adobe Photoshop software) to produce a reasonable representation of the photographic image, these adjustments are very similar to how a photographer prints a negative in the darkroom. [photograph -- NRCA-142-INFO01-3169D, RG 142 Records of the TVA, NARA -- Southeast Region (Atlanta)] -54-
-55- For stereograph images and other multiple image prints, modified recommended scanning specifications are to scan to original size (length of both photos and mount) and add 2000 pixels to the long dimension, in the event that only one of the photographs is requested for high-quality reproduction. For example, if the stereograph is 8" on the long dimension, a resolution of 500 ppi would be required to achieve 4000 pixels across the long dimension for that size format; in this case, adding 2000 pixels to the long dimension would require that the stereograph be scanned at 750 ppi to achieve the desired 6000 pixels across the long dimension. For photographic prints, size measurements for determining appropriate resolution are based on the size of the image area only, excluding any borders, frames, or mounts. However, in order to show that the entire record has been captured, it is good practice to capture the border area in the master scan file. In cases where a small image is mounted on a large board (particularly where large file sizes may be an issue), it may be desirable to scan the image area only at the appropriate resolution for its size, and then scan the entire mount at a resolution that achieves 4000 pixels across the long dimension. -56-
*If scans of aerial photography will be used for oversized reproduction, follow the scanning recommendations for the next largest format (e.g., if your original is 70mm wide, follow the specifications for 127mm wide roll film to achieve 8000 pixels across the long dimensions. -57-
*If scans of aerial photography will be used for oversized reproduction, follow the scanning recommendations for the next largest format (e.g., if your original is 8"x10", follow the specifications for formats larger than 8"x10" to achieve 6000 pixels across the long dimensions. -58-
High resolution digital photography requirements:
Actual pixel dimensions and aspect ratio will vary depending on digital camera -- illustrative sizes, dimensions, and proportions are:
File Formats -- Image files shall be saved using the following formats:
Image Quality -- Digital cameras shall produce high quality image files, including:
-59- White Balance -- Digital cameras shall be used on automatic white balance or the white balance shall be selected manually to match the light source. Color Profile -- Image files saved with a custom ICC image profile (done in camera or profile produced after photography using profiling software) or a standard color space like sRGB should be converted to a standard wide-gamut color space like Adobe RGB 1998. Header Data -- If camera supports EXIF header data, data in all tags shall be saved. Image Stitching -- Some cameras and many software applications will stitch multiple images into a single image, such as stitching several photographs together to create a composite or a panorama. The stitching process identifies common features within overlapping images and merges the images along the areas of overlap. This process may cause some image degradation. Consider saving and maintaining both the individual source files and the stitched file. -60- VI. STORAGEFile Formats:We recommend the Tagged Image File Format or TIFF for production master files. Use TIFF version 6, with Intel (Windows) byte order. For additional information on file formats for production masters, see Appendix D, File Format Comparison. Uncompressed files are recommended, particularly if files are not actively managed, such as storage on CD-ROM or DVD-ROM. If files are actively managed in a digital repository, then you may want to consider using either LZW or ZIP lossless compression for the TIFF files. Do not use JPEG compression within the TIFF format. File Naming:A file naming scheme should be established prior to capture. The development of a file naming system should take into account whether the identifier requires machine- or human-indexing (or both -- in which case, the image may have multiple identifiers). File names can either be meaningful (such as the adoption of an existing identification scheme which correlates the digital file with the source material), or non-descriptive (such as a sequential numerical string). Meaningful file names contain metadata that is self-referencing; non-descriptive file names are associated with metadata stored elsewhere that serves to identify the file. In general, smaller-scale projects may design descriptive file names that facilitate browsing and retrieval; large-scale projects may use machine-generated names and rely on the database for sophisticated searching and retrieval of associated metadata. In general, we recommend that file names --
Directory structure --Regardless of file name, files will likely be organized in some kind of file directory system that will link to metadata stored elsewhere in a database. Production master files might be stored separately from derivative files, or directories may have their own organization independent of the image files, such as folders arranged by date or record group number, or they may replicate the physical or logical organization of the originals being scanned. The files themselves can also be organized solely by directory structure and folders rather than embedding meaning in the file name. This approach generally works well for multi-page items. Images are uniquely identified and aggregated at the level of the logical object (i.e., a book, a chapter, an issue, etc.), which requires that the folders or directories be named descriptively. The file names of the individual images themselves are unique only within each directory, but not across directories. For example, book 0001 contains image files 001.tif, 002.tif, 003.tif, etc. Book 0002 contains image files 001.tif, 002.tif, 003.tif. The danger with this approach is that if individual images are separated from their parent directory, they will be indistinguishable from images in a different directory. -61- In the absence of a formal directory structure, we are currently using meaningful file names. The item being scanned is assigned a 5-digit unique identifier (assigned at the logical level). This identifier has no meaning in the scanning process, but does carry meaning in a system that links the image file(s) to descriptive information. Also embedded in the file name is the year the file was scanned as well as a 3-digit sequential number that indicates multiple pages. This number simply records the number of files belonging to an object; it does not correlate with actual page numbers. The organization is: logical item ID_scan year_page or file number_role of image.tif; e.g., 00001_2003_001_MA.tif. Versioning --For various reasons, a single scanned object may have multiple but differing versions associated with it (for example, the same image prepped for different output intents, versions with additional edits, layers, or alpha channels that are worth saving, versions scanned on different scanners, scanned from different original media, scanned at different times by different scanner operators, etc.). Ideally, the description and intent of different versions should be reflected in the metadata; but if the naming convention is consistent, distinguishing versions in the file name will allow for quick identification of a particular image. Like derivative files, this usually implies the application of a qualifier to part of the file name. The reason to use qualifiers rather than entirely new names is to keep all versions associated with a logical object under the same identifier. An approach to naming versions should be well thought out; adding 001, 002, etc. to the base file name to indicate different versions is an option; however, if 001 and 002 already denote page numbers, a different approach will be required. Naming derivative files --The file naming system should also take into account the creation of derivative image files made from the production master files. In general, derivative file names are inherited from the production masters, usually with a qualifier added on to distinguish the role of the derivative from other files (i.e., "pr" for printing version, "t" for thumbnail, etc.) Derived files usually imply a change in image dimensions, image resolution, and/or file format from the production master. Derivative file names do not have to be descriptive as long as they can be linked back to the production master file. For derivative files intended primarily for Web display, one consideration for naming is that images may need to be cited by users in order to retrieve other higher-quality versions. If so, the derivative file name should contain enough descriptive or numerical meaning to allow for easy retrieval of the original or other digital versions. Storage Recommendations:We recommend that production master image files be stored on hard drive systems with a level of data redundancy, such as RAID drives, rather than on optical media, such as CD-R. An additional set of images with metadata stored on an open standard tape format (such as LTO) is recommended (CD-R as backup is a less desirable option), and a backup copy should be stored offsite. Regular backups of the images onto tape from the RAID drives is also recommended. A checksum should be generated and should be stored with the image files. Currently, we use CD-ROMs for distribution of images to external sources, not as a long-term storage medium. However, if images are stored on CD-ROMs, we recommend using high quality or "archival" quality CD-Rs (such as Mitsui Gold Archive CD-Rs). The term "archival" indicates the materials used to manufacture the CD-R (usually the dye layer where the data is recording, a protective gold layer to prevent pollutants from attacking the dye, or a physically durable top-coat to protect the surface of the disk) are reasonably stable and have good durability, but this will not guarantee the longevity of the media itself. All disks need to be stored and handled properly. We have found files stored on brand name CD-Rs that we have not been able to open less than a year after they have been written to the media. We recommend not using inexpensive or non-brand name CD-Rs, because generally they will be less stable, less durable, and more prone to recording problems. Two (or more) copies should be made; one copy should not be handled and should be stored offsite. Most importantly, a procedure for migration of the files off of the CD-ROMs should be in place. In addition, all copies of the CD-ROMs should be periodically checked using a metric such as a CRC (cyclic redundancy checksum) for data integrity. For large-scale projects or for projects that create very large image files, the limited capacity of CD-R storage will be problematic. DVD-Rs may be considered for large projects, however, DVD formats are not as standardized as the lower-capacity CD-ROM formats, and compatibility and obsolescence in the near future is likely to be a problem. Digital repositories and the long-term management of files and metadata --Digitization of archival records and creation of metadata represent a significant investment in terms of time and money. Is it important to realize the protection of these investments will require the active management of both the -62- image files and the associated metadata. Storing files to CD-R or DVD-R and putting them on a shelf will not ensure the long-term viability of the digital images or the continuing access to them. We recommend digital image files and associated metadata be stored and managed in a digital repository, see www.rlg.org/longterm, www.nla.gov.au/padi/, and www.dpconline.org/. The Open Archival Information System (OAIS) reference model standard describes the functionality of a digital repository -- see www.rlg.org/longterm/oais.html and http://ssdoo.gsfc.nasa.gov/nost/isoas/overview.html. NARA is working to develop a large scale IT infrastructure for the management of, preservation of, and access to electronic records, the Electronic Records Archive (ERA) project. Information is available at http://www.archives.gov/electronic_records_archives/index.html. ERA will be an appropriate repository for managing and providing access to digital copies of physical records.VII. QUALITY CONTROLQuality control (QC) and quality assurance (QA) are the processes used to ensure digitization and metadata creation are done properly. QC/QA plans and procedures should address issues relating to the image files, the associated metadata, and the storage of both (file transfer, data integrity). Also, QC/QA plans should address accuracy requirements for and acceptable error rates for all aspects evaluated. For large digitization projects it may be appropriate to use a statistically valid sampling procedure to inspect files and metadata. In most situations QC/QA are done in a 2-step process -- the scanning technician will do initial quality checks during production and this is followed by a second check by another person. A quality control program should be initiated, documented, and maintained throughout all phases of digital conversion. The quality control plan should address all specifications and reporting requirements associated with each phase of the conversion project. Completeness --We recommend verification that 100% of the required images files and associated metadata have been completed or provided. Inspection of digital image files --The overall quality of the digital images and metadata will be evaluated using the following procedures. The visual evaluation of the images shall be conducted while viewing the images at a 1 to 1 pixel ratio or 100% magnification on the monitor. We recommend, at a minimum, 10 images or 10 % of each batch of digital images, whichever quantity is larger, should be inspected for compliance with the digital imaging specifications and for defects in the following areas:
-64- Quality control of metadata --Quality control of metadata should be integrated into the workflow of any digital imaging project. Because metadata is critical to the identification, discovery, management, access, preservation, and use of digital resources, it should be subject to quality control procedures similar to those used for verifying the quality of digital images. Since metadata is often created and modified at many points during an image's life cycle, metadata review should be an ongoing process that extends across all phases of an imaging project and beyond. As with image quality control, a formal review process should also be designed for metadata. The same questions should be asked regarding who will review the metadata, the scope of the review, and how great a tolerance is allowed for errors. Practical approaches to metadata review may depend on how and where the metadata is stored, as well as the extent of metadata recorded. It is less likely that automated techniques will be as effective in assessing the accuracy, completeness, and utility of metadata content (depending on its complexity), which will require some level of manual analysis. Metadata quality assessment will likely require skilled human evaluation rather than machine evaluation. However, some aspects of managing metadata stored within a system can be monitored using automated system tools (for example, a digital asset management system might handle verification of relationships between different versions of an image, produce transaction logs of changes to data, produce derivative images and record information about the conversion process, run error detection routines, etc.). Tools such as checksums (for example, the MD5 Message-Digest Algorithm) can be used to assist in the verification of data that is transferred or archived. Although there are no clearly defined metrics for evaluating metadata quality, the areas listed below can serve as a starting point for metadata review. Good practice is to review metadata at the time of image quality review. In general, we consider:
-65- Specifically, we consider:
Documentation --Quality control data (such as logs, reports, decisions) should be captured in a formal system and should become an integral part of the image metadata at the file or the project level. This data may have long-term value that could have an impact on future preservation decisions. Testing results and acceptance/rejection --If more than 1% of the total number of images and associated metadata in a batch, based on the randomly selected sampling, are found to be defective for any of the reasons listed above, the entire batch should be re-inspected. Any specific errors found in the random sampling and any additional errors found in the re-inspection should be corrected. If less than 1% of the batch is found to be defective, then only the specific defective images and metadata that are found should be redone. -66- APPENDIX A: Digitizing for Preservation vs. Production Masters:In order to consider using digitization as a method of preservation reformatting it will be necessary to specify much more about the characteristics and quality of the digital images than just specifying spatial resolution. The following chart provides a comparison of image characteristics for preservation master image files and production master image files --
-70- APPENDIX B: Derivative FilesThe parameters for access files will vary depending on the types of materials being digitized and the needs of the users of the images. There is no set size or resolution for creating derivative access files. The following charts provide some general recommendations regarding image size, resolution, and file formats for the creation of derivative images from production master image files. From a technical perspective, records that need similar derivatives have been grouped together --
JPEG compression was designed for photographic images and sacrifices fine detail to save space when stored, while preserving the large features of an image. JPEG compression creates artifacts around text when used with digital images of text documents at moderate to high compression levels. Also, JPEG files will be either 24-bit RGB images or 8-bit grayscale, they can not have lower bit depths. GIF files use LZW compression (typical compression ratio is 2:1, or the file will be half original size), which is lossless and does not create image artifacts; therefore, GIF files may be more suitable for access derivatives of text documents. The GIF format supports 8-bit (256 colors), or lower, color files and 8-bit, or lower, grayscale files. All color GIF files and grayscale GIF files with bit-depths less than 8-bits are usually dithered (the distribution of pixels of different shades in areas of another shade to simulate additional shading). Well dithered images using an adaptive palette and diffusion dither will visually have a very good appearance, including when used on photographic images. In many cases a well produced GIF file will look better, or no worse, than a highly compressed JPEG file (due to the JPEG artifacts and loss of image sharpness), and for textual records the appearance of a GIF format derivative is often significantly better than a comparable JPEG file. The following table compares the uncompressed and compressed file sizes for the same image when using GIF format vs. JPEG
format:
As you can see, when the files are open the GIF file will be smaller due to the lower bit-depth and when stored the JPEG will be smaller due to the higher compression ratio. GIF files will take longer to download, but will decompress quicker and put less demand on the end user's CPU in terms of memory and processor speed. JPEG files will download quicker, but will take longer to decompress putting a greater demand on the end user's CPU. Practical tests have shown a full page of GIF images generally will download, decompress, and display more quickly than the same page full of JPEG versions of the images. The newer JPEG 2000 compression algorithm is a wavelet compression, and can be used to compress images to higher compression ratios with less loss of image quality compared to the older JPEG algorithm. Generally, JPEG 2000 will not produce the same severity of artifacts around text that the original JPEG algorithm produces. -71-
*Many digitization projects do not make thumbnail files for textual records -- the text is not legible and most documents look alike when the images are this small, so thumbnails may have limited usefulness. However, thumbnail images may be needed for a variety of web uses or within a database, so many projects do create thumbnails from textual documents. **Includes posters, artwork, illustrations, etc., generally would include any item that is graphic in nature and may have text as well. -72-
-73-
-74- APPENDIX C: Mapping of LCDRG Elements to Unqualified Dublin Core (Mandatory Metadata Elements excerpted from the Lifecycle Data Requirements Guide [LCDRG])3 Lifecycle Data Requirements Guide. Second Revision, January 18, 2002 http://www.nara-at-work.gov/archives_and_records_mgmt/archives_and_activities/accessioning_processing_description/lifecycle/mandatory elements.html
Note: Many of the LCDRG elements above use authority lists for data values that may not necessarily map into recommended Dublin Core Metadata Initiative typology for vocabulary terms, data values, and syntax or vocabulary encoding schemes. Please consult the LCDRG for acceptable data values. This table suggests a simple mapping only. It is evident that Dublin Core elements are extracted from a much richer descriptive set outlined in the LCDRG framework. Dublin Core elements are repeatable to accommodate multiple LCDRG fields; however, repeatability of fields is not equivalent to the complex structure of archival collections that the LCDRG attempts to capture. As a result, mapping to Dublin Core may result in a loss of information specificity and/or meaning in an archival context. A more detailed analysis of how LCDRG values are being implemented in Dublin Core will be necessary. -76- APPENDIX D: File Format ComparisonAs stated earlier, the choice of file format has a direct affect on the performance of the digital image as well as implications for long term management of the image. Future preservation policy decisions, such as what level of preservation service to apply, are often made on a format-specific basis*. A selection of file formats commonly used for digital still raster images are listed below. The first table lists general technical characteristics to consider when choosing an appropriate file format as well as a statement on their recommended use in imaging projects. Generally, these are all well-established formats that do not pose a big risk to the preservation of content information; however, it is advised that an assessment of the potential longevity and future functionality of these formats be undertaken for any digital imaging project. The second table attempts to summarize some of these concerns.
* For example, DSpace directly associates various levels of preservation services with file formats -- categorized as supported formats, known formats, and unknown formats. See http://dspace.org/faqs/index.html#preserve. The Florida Center for Library Automation (FCLA) specifies preferred, acceptable, and bit-level preservation only categories for certain file formats for their digital archive. See http://www.fcla.edu/digitalArchive/pdfs/recFormats.pdf. -78- For additional information on research into file format longevity, see Digital Formats for Library of Congress Collections: Factors to Consider When Choosing Digital Formats by Caroline Arms and Carl Fleischhauer at: http://memory.loc.gov/ammem/techdocs/digform/, from which many of the considerations below were taken; see also the Global Digital Format Registry (GDFR) at http://hul.harvard.edu/gdfr/ for discussion of a centralized, trusted registry for information about file formats.
-79- APPENDIX E: Records Handling for DigitizationAll digitization projects should have pre-established handling guidelines. The following provides general guidance on the proper handling of archival materials for digitization projects. This appendix is provided for informational purposes and does not constitute a policy. Handling guidelines may need to be modified for specific projects based on the records being digitized and their condition. 1. Physical SecurityAs records are received for digitization, they should be logged into the lab area for temporary storage. The log should include --
The above list is not intended to be comprehensive, other fields may be required or desirable. Records should be stored in a secure area that provides appropriate physical protection. Storage areas should meet all NARA requirements and environmental standards for records storage or processing areas -- see 36 CFR, Part 1228, Subpart K, Facility Standards for Records Storage Facilities at http://www.archives.gov/about_us/regulations/part_1228_k.html. 2. Equipment
-80- 3. Procedures
4. TrainingTraining shall be provided by Preservation Programs, NWT, for archival material handling and certification of unit/partner/contractor staff prior to beginning any digitization. Any new unit/partner/contractor staff assigned to this project after the start date shall be trained and certified before handling archival materials. -82- APPENDIX F: ResourcesScope --
Introduction --General Resources --
Project Management Outlines --
-83- MetadataCommon Metadata Types
-84- Assessment of Metadata Needs for Imaging Projects
-85- Technical OverviewGlossaries of Technical Terms --
Raster Image Characteristics --
Digitization EnvironmentStandards --
Quantifying Scanner/Digital Camera Performance --Standards --
These standards can be purchased from ISO at http://www.iso.ch or from IHS Global at http://global.ihs.com.
-86- Color Management --
Image Processing Workflow --
Digitization in Production Environments --
Digitization Specifications for Record TypesImaging guidelines
-87- Imaging Techniques --
Storage and Digital Preservation
Quality Control, Testing Results, and Acceptance/Rejection
|
|||||||||||||||||||||||||||||||||||||||||||||||||||||||||||||||||||||||||||||||||||||||||||||||||||||||||||||||||||||||||||||||||||||||||||||||||||||||||||||||||||||||||||||||||||||||||||||||||||||||||||||||||||||||||||||||||||||||||||||||||||||||||||||||||||||||||||||||||||||||||||||||||||||||||||||||||||||||||||||||||||||||||||||||||||||||||||||||||||||||||||||||||||||||||||||||||||||||||||||||||||||||||||||||||||||||||||||||||||||||||||||||||||||||||||||||||||||||||||||||||||||||||||||||||||||||||||||||||||||||||||||
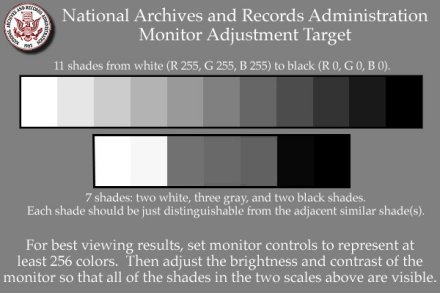
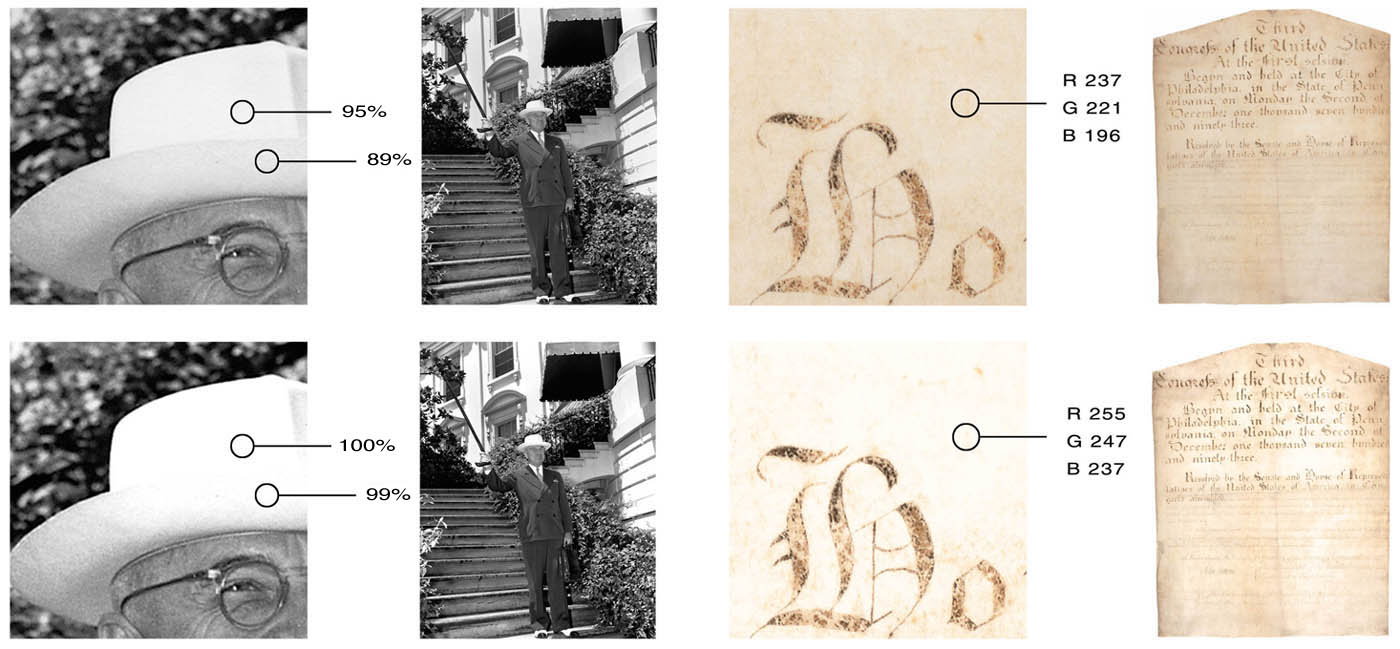
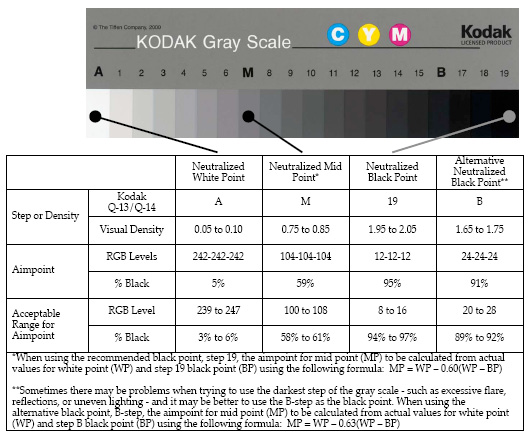
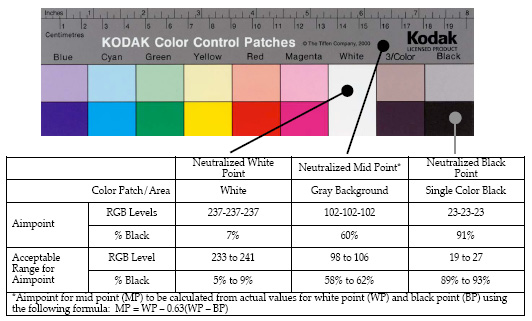
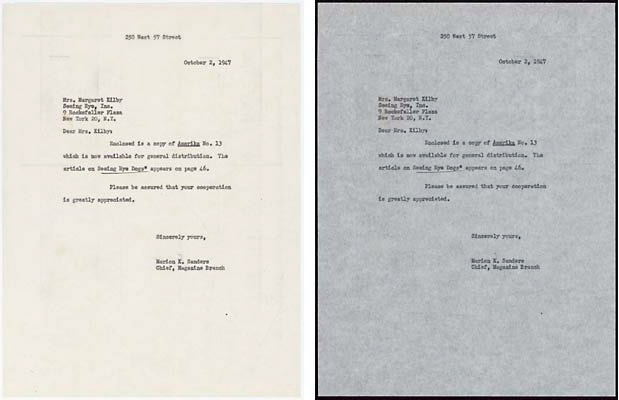

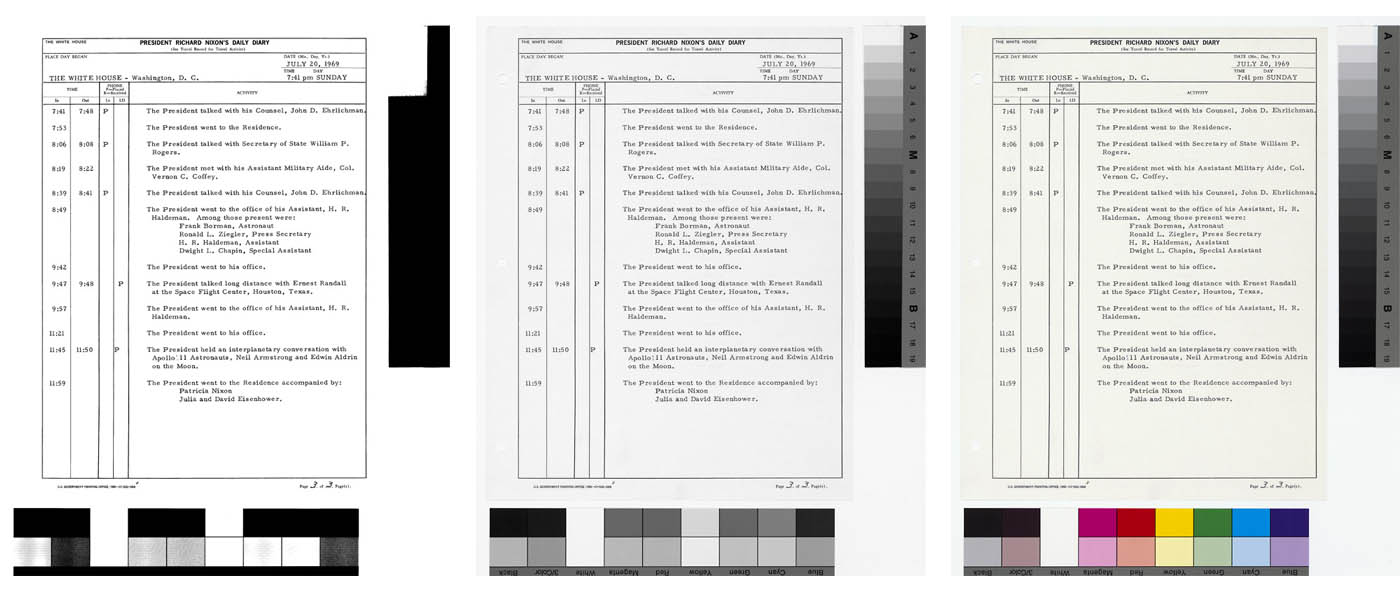
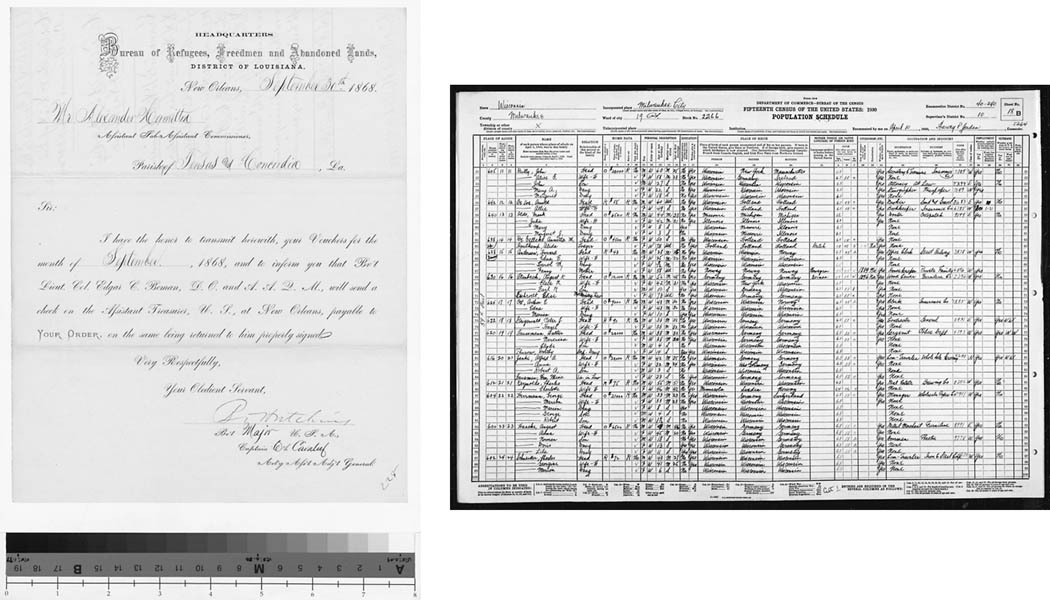
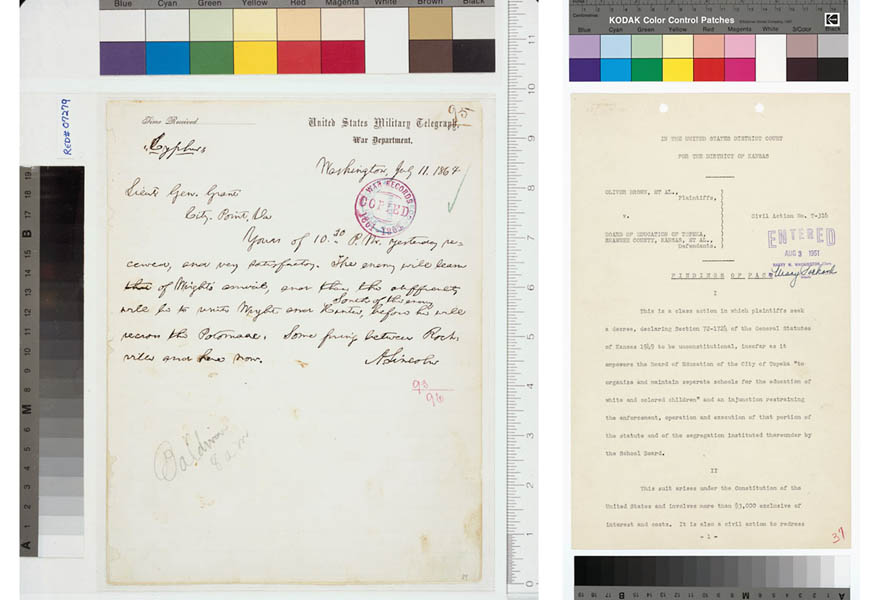
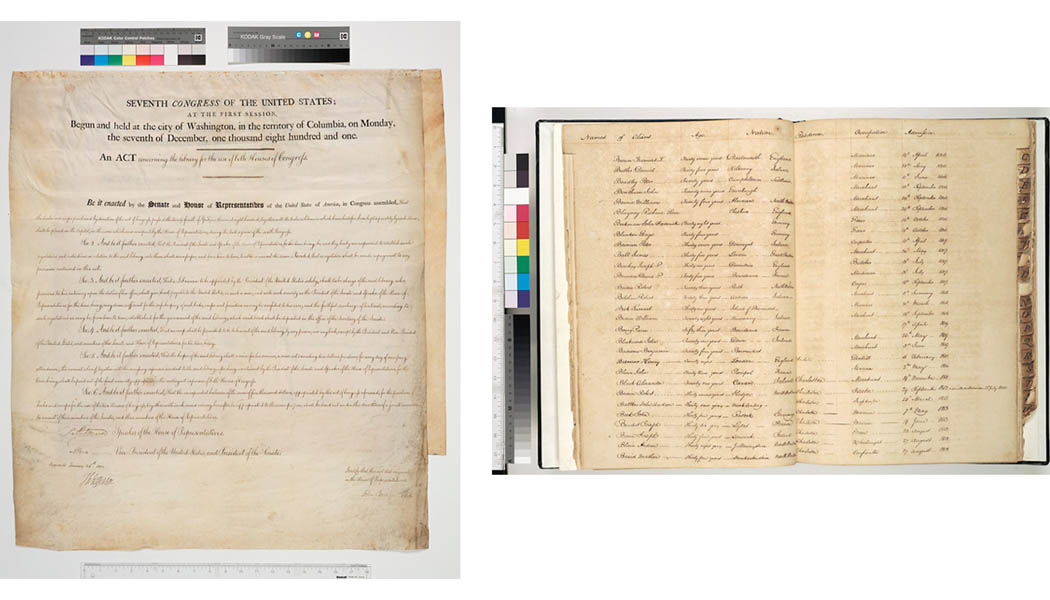
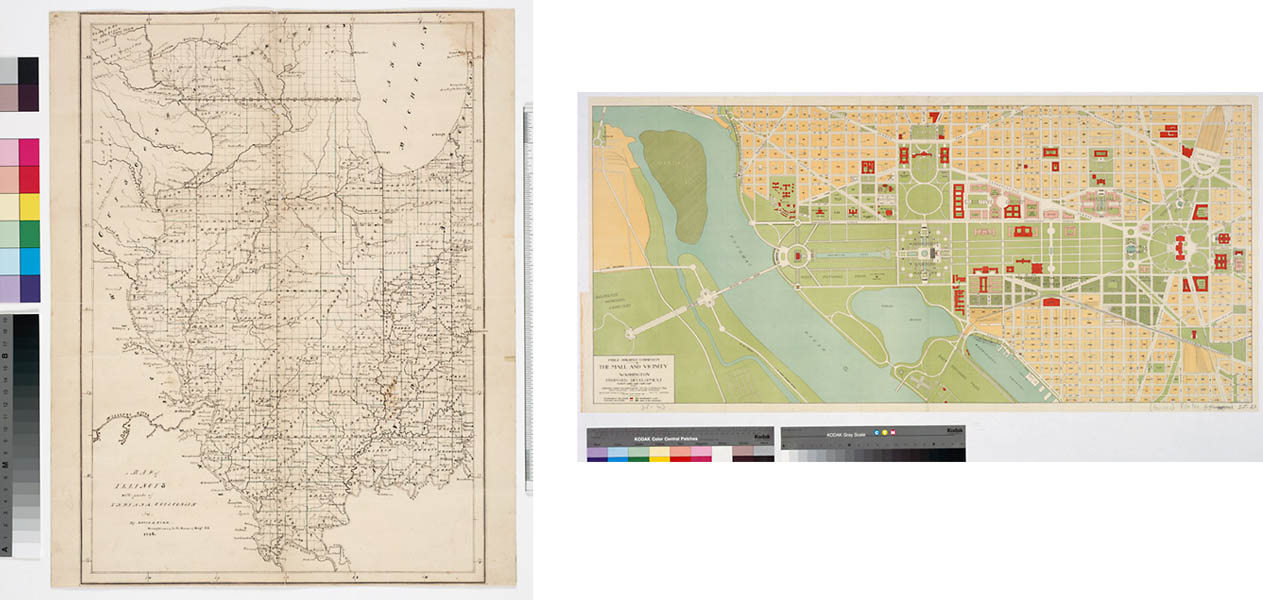
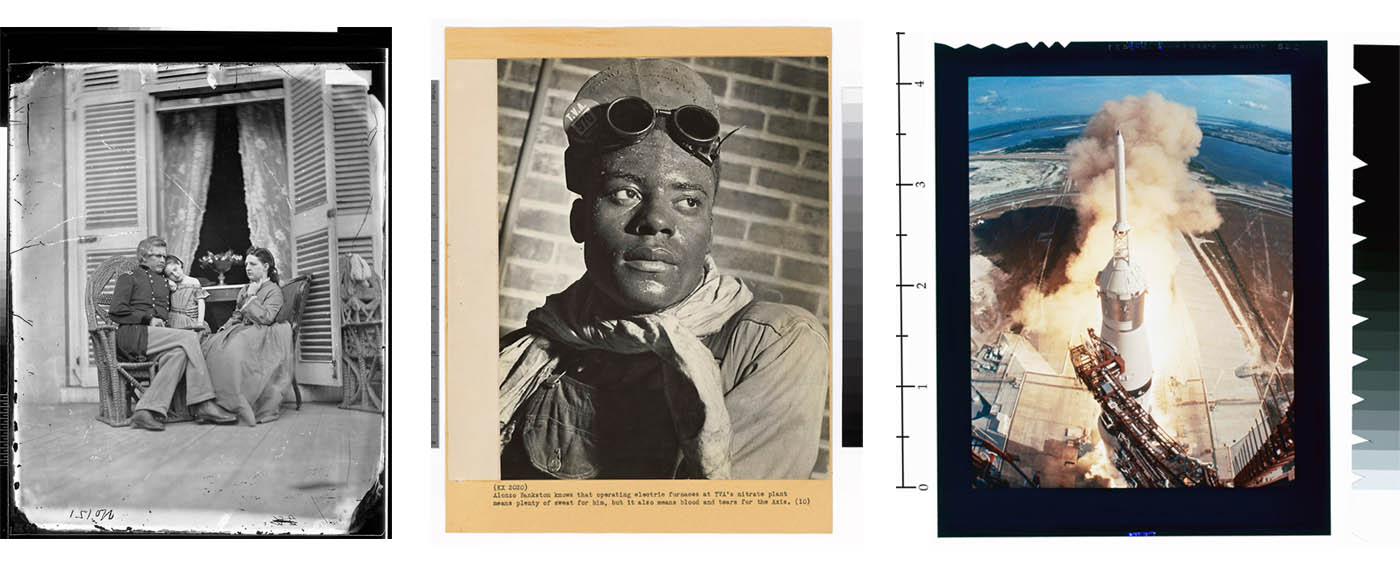
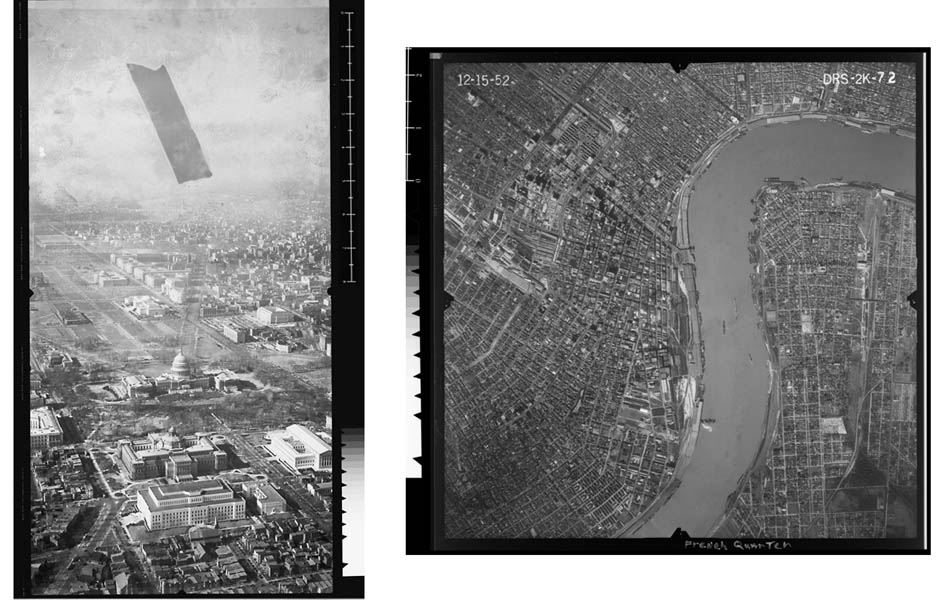

Copyright © 2006 Digital Library Federation. All rights reserved.
Last updated: